Essential Tool Kits for Smart Home & AI DIY for Indoor and Outdoor Use (Winter, December, Christmas)
Tools Needed
Materials Needed
Safety Tips
- Always turn off power at the circuit breaker before installing electrical devices.
- Use a ladder safely when installing devices at height.
- Be cautious of hidden electrical wires or plumbing when drilling into walls or ground.
Essential Tool Kits for Smart Home & AI DIY for Indoor and Outdoor Use (Winter, December, Christmas)
As the holiday season rolls around, many of us find ourselves wanting to enhance our homes with smart technology. Whether you’re looking to automate your indoor lights for a cozy Christmas vibe or set up outdoor sensors to keep tabs on winter weather, having the right tools at your disposal can make all the difference. This guide is for those of you who want to integrate smart devices into your home, whether you're a seasoned DIYer or just starting out. I remember the first time I tried to set up smart lights for my home. I had high hopes, but without the right tools and a solid plan, I ended up frustrated. Luckily, with a few essential tools and some straightforward steps, you can create a smart home that works for you.
In this article, we’ll cover everything from what tools you need to how to troubleshoot common issues. You'll be equipped to not only set up your devices but also understand how to make them work together seamlessly. And remember, smart devices are all about making your life easier—so let’s get started!
Before You Start / What to Know Up Front
Before diving into your smart home project, it’s essential to know what you’re getting into. Smart devices can be a game-changer, but they require a bit of planning and preparation. You should have a basic understanding of your home’s Wi-Fi system and how smart devices typically connect to it. It’s also worth noting that not all smart devices work well together, so researching compatibility ahead of time can save you a lot of headaches.
I often tell DIYers that patience is key. The first time I set up a smart thermostat, I expected it to be a quick job. But after a few missteps and double-checking my Wi-Fi signals, I learned that taking my time led to a smoother setup. If you’re someone who enjoys tinkering and learning, you’ll find this experience rewarding. This guide is designed for anyone looking to take their first steps into smart home technology, so don’t worry if you’re new to it all.
Method Overview
The method we’ll use in this guide is straightforward: we’ll break down each component of your smart home setup into manageable steps. We’ll cover the tools you’ll need, how to set up your devices, and how to troubleshoot any issues that arise. This approach works well because it allows you to focus on one task at a time, minimizing the chance of feeling overwhelmed.
However, if you’re planning to integrate a large number of devices or set up complex automations, it might not be the best fit. In such cases, consider consulting with a professional or tackling the project in phases. Remember, the goal is to create a smart home that works for you without unnecessary stress.
Deep Step Detail
To get you started, here’s a step-by-step breakdown of setting up your smart home devices.
Step 1: Gather Your Tools
Before diving into the installation, gather your tools. Here’s what you’ll typically need:
- Screwdrivers (both Phillips and flathead)
- A drill with drill bits (for mounting devices)
- A smartphone or tablet (for app installations)
- A ladder (for outdoor devices or high placements)
- A multimeter (to check electrical connections, if necessary)
- A Wi-Fi extender (if your signal is weak in certain areas)
Having everything on hand will save you multiple trips to the garage or store. I once started a project without a multimeter and ended up running back to get one when I needed to check the voltage. It’s a time-saver to be prepared, and a good multimeter is a small investment that pays off.
Step 2: Plan Your Layout
Identify where you want to place your smart devices. Take into account the Wi-Fi coverage and accessibility to power outlets. For indoor setups, consider areas where you spend a lot of time, like the living room or kitchen. For outdoor devices, think about entry points, lighting, and security coverage.
I recommend sketching out a simple map of your home and marking where each device will go. This visual can help you see how everything will fit together and ensure you have the necessary power sources nearby. Most DIYers forget to consider outlet availability, which can complicate installation.
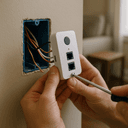
Step 3: Install Indoor Devices
Start by installing your indoor devices such as smart bulbs, plugs, or thermostats. For smart bulbs, simply replace your existing bulbs with the smart ones. Follow the manufacturer’s instructions for connecting them to your Wi-Fi network using the app.
When installing a smart thermostat, be sure to turn off the power at the circuit breaker to avoid any shocks—this is crucial for safety! I recall a friend who overlooked this step and had a close call—safety first!
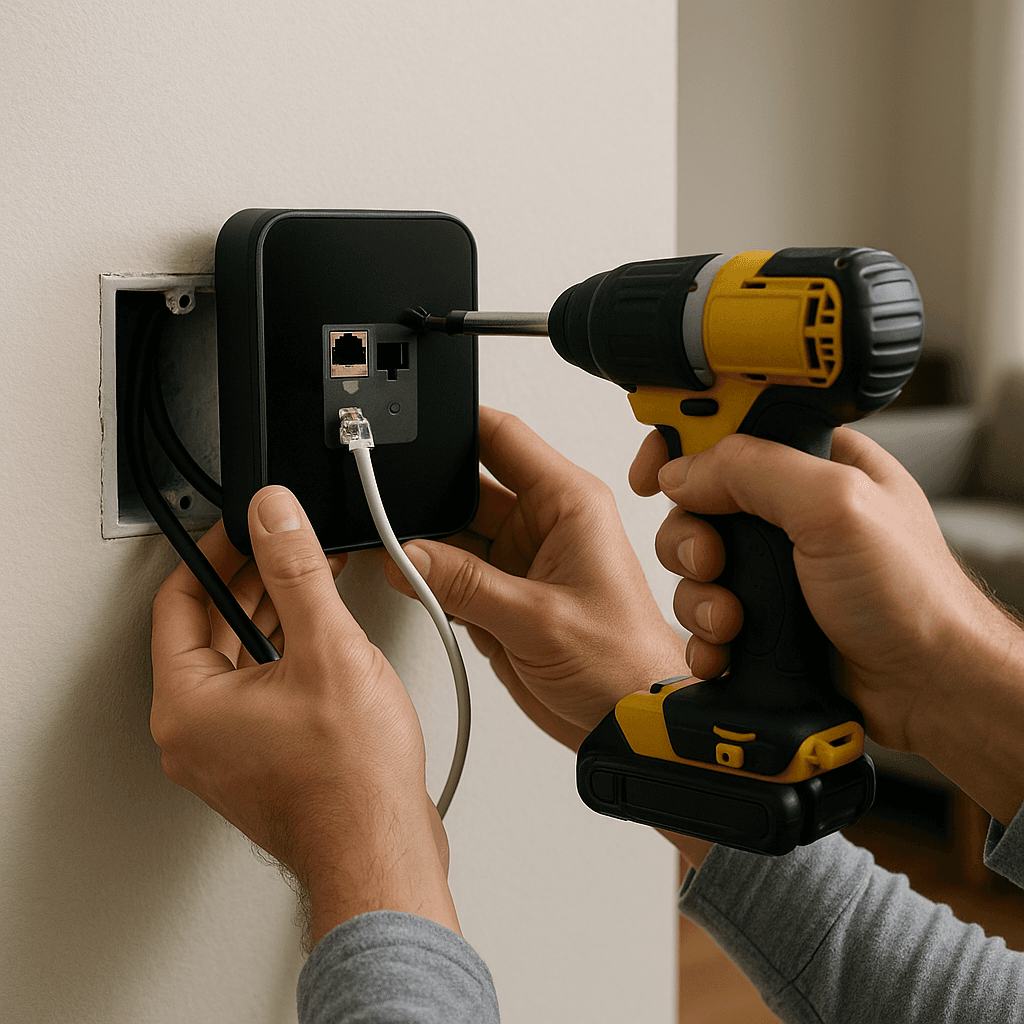
Step 4: Install Outdoor Devices
For outdoor devices like smart security cameras or motion sensors, follow the same principle. Ensure you use weatherproof devices designed for outdoor use. When mounting, make sure they’re positioned to cover the areas you want to monitor without obstructions. If you're using a drill, be cautious of electrical wires or plumbing that might be hidden behind walls or in the ground.
A common mistake is placing cameras too high or too low. Aim for eye-level for optimal coverage. If you're unsure, take a test run by holding the device in the proposed position before committing to a mounting location.
Step 5: Configure Your Devices
Once everything is installed, it’s time to configure your devices. Use the respective apps to connect them to your Wi-Fi network and set up any necessary accounts. Most apps will guide you through the process step-by-step, which is a relief when you’re juggling multiple devices.
Don’t forget to name your devices clearly in the app; this will help you manage them more easily later on.
Step 6: Create Automations
After your devices are up and running, explore the automation features. For instance, you can set your lights to turn on at sunset or have your thermostat adjust the temperature when you leave home. This is where things get fun! Play around with the settings until you find a routine that works for you and your family.
Just be careful not to overload your automation schedules; too many triggers can lead to confusion and unexpected behavior.
Troubleshooting & Fix-ups
It’s common to run into a few hiccups when setting up smart devices, so let’s cover some of the typical problems and how to fix them.
One common issue is connectivity. If your devices are not connecting to Wi-Fi, check the following:
- Ensure you’re within range of your router.
- Make sure the device is compatible with your router’s frequency (2.4 GHz vs. 5 GHz).
- Restart your router and the smart device.
If you’re still having trouble, a Wi-Fi extender can help boost your signal in areas where it’s weak. I’ve had to use one in my basement where the signal was spotty—it made all the difference!
Another issue is app compatibility. Sometimes, updates can cause devices to become unresponsive. If you notice a device isn’t working as it should, try uninstalling and reinstalling the app, or check for updates to both the app and the device firmware.
Common Mistakes & How to Avoid Them
In my years of DIYing, I’ve seen some common mistakes that can easily be avoided. Here are a few:
- Not Checking Compatibility: Always ensure that your devices are compatible with each other and your home network before making a purchase. It can be frustrating to discover that your shiny new gadget doesn’t play nice with your existing setup.
- Ignoring Safety Precautions: When handling electrical devices, always turn off the power at the circuit breaker. This can save you from serious injury and is a vital step that some rush through.
- Poor Placement: Many DIYers place devices in areas with weak Wi-Fi signals or too far from power outlets. Take the time to plan where each device will go before installation. A simple Wi-Fi test can help you find the best spots.
- Overlooking Updates: Regularly check for software updates on your devices and apps. These updates often include fixes and new features that can enhance your setup. I’ve missed out on neat features just because I forgot to hit ‘update.’
- Rushing the Setup: It’s easy to get excited and rush through the setup process. Take your time and follow the instructions closely—this will save you time in the long run. I’ve made this mistake before and regretted it later when I had to backtrack.
Pro Tips & Lessons Learned
Here are a few pro tips I’ve picked up along the way:
- Label Your Devices: As you set up multiple smart devices, label each device in the app or your sketch. This will help you manage them more easily and recall which device is which.
- Test Before Finalizing: Before mounting any devices permanently, test them in their proposed locations. This way, you can ensure they work as expected before committing to a permanent installation. You’d be surprised how often a device works better in a different spot!
- Keep a Backup: If you’re making significant changes to your network or device setups, consider keeping a backup of your configurations or settings. This can save you a lot of hassle if you ever need to reset or reconfigure. Plus, it’s always good to have a plan B.
- Invest in Quality Tools: Having the right tools can make a world of difference. Investing in a good drill, a reliable screwdriver set, and a multimeter can pay off in the long run, making your projects easier and safer.
Budget & Time Signals
When it comes to budgeting for your smart home project, costs can vary widely based on what devices you choose and how many you plan to integrate. On average, you might spend anywhere from $50 to $500 or more for a basic setup, but remember that quality often matters more than quantity.
For time, plan for at least a weekend for a comprehensive setup, especially if you’re trying to do both indoor and outdoor devices. Rushing can lead to mistakes, so take your time and enjoy the process. Phasing your projects—starting with indoor devices and then moving outdoors—can also help manage costs and time better.
When to Call a Pro
While many DIYers can handle basic smart home setups, there are times when it’s best to call in a pro. If you encounter issues with electrical wiring, such as needing to install new outlets or dealing with complex configurations, it’s a good idea to consult a licensed electrician.
Additionally, if you’re trying to integrate a large number of devices that require extensive network management or if you’re unsure about safety protocols, don’t hesitate to reach out for professional help. It’s always better to be safe than sorry when it comes to electrical work.
Conclusion
Setting up a smart home can be an exciting journey, especially during the winter months when we all want a little extra comfort and convenience. With the right tools, a solid plan, and a bit of patience, you can create a home that not only meets your needs but also enhances the way you live.
Don’t forget to enjoy the process—each little victory, from getting your first smart bulb to automating your holiday lights, is a step toward a more efficient home. So grab your tools, gather your devices, and start transforming your space today! You’ve got this!
Recommended Gear
Disclosure: As an Amazon Associate, we may earn from qualifying purchases at no extra cost to you.
Common Mistakes
- Not checking device compatibility with your home network and other devices.
- Ignoring safety precautions such as turning off power before installation.
- Poor device placement leading to weak Wi-Fi signals or lack of power access.
- Overloading automation schedules causing confusion and unexpected device behavior.
)