Time-Saving Tool Kits for Smart Home & AI DIY You Can Start This Weekend (Winter, December, Christmas)
Tools Needed
Safety Tips
- Always turn off power before installing electrical devices to avoid shocks.
- Use a voltage tester to confirm wires are not live before touching them.
- Secure your network credentials and change default passwords on devices.
- Enable two-factor authentication when available to protect your smart home.
Time-Saving Tool Kits for Smart Home & AI DIY You Can Start This Weekend
When it comes to sprucing up your home with smart devices, it can feel overwhelming. The first time I tried to automate my home, I spent an entire weekend fiddling with wires, apps, and instructions that seemed to be written in a foreign language. But once I figured out a few key tools and a systematic approach, I realized it could be as easy as pie! This guide is for anyone looking to dive into the world of smart home technology and AI DIY projects, especially if you want to start something this weekend. Whether you're a seasoned DIYer or just starting out, this article will help you set up your smart home efficiently, ensuring you save time and get the most out of your devices.
Before You Start / What to Know Up Front
Before jumping into the world of smart home devices, it’s essential to set your expectations straight. This isn’t just about buying the latest gadgets; it’s about integrating them into your daily life. The first time I attempted to set up a smart thermostat, I didn't realize how interconnected everything could become. It wasn't just about heating my home; I had to think about my Wi-Fi network, compatibility with other devices, and even how to secure my information. This guide is ideal for DIYers who want to save time and make their homes smarter without feeling lost in the process. You’ll learn about the must-have tools and techniques that will help you navigate the sometimes tricky waters of home automation.
Method Overview
The method we’re going to use is straightforward: we’ll focus on building a solid foundation with a time-saving toolkit that covers various smart home projects. The approach works because it combines practical tools, clear steps, and tried-and-true techniques that I’ve learned from years of experience. However, this method isn’t a one-size-fits-all solution. If you’re dealing with extensive wiring or complex setups, it might be best to consult an expert to avoid any mishaps.
Deep Step Detail
Now, let’s get into the nitty-gritty. Here’s a step-by-step breakdown of how to set up your smart home using a simple toolkit. I recommend starting with these projects:
- Assess Your Needs
Before you buy any devices, take a moment to assess what you want your smart home to do. Do you want smart lighting, security cameras, or a thermostat? Understanding your needs will guide your purchases. I remember thinking I needed everything at once, but I quickly realized focusing on one project at a time was much more manageable. It’s like deciding on whether to tackle your living room or kitchen first—focus helps!
- Gather Your Tools
Here’s a list of essential tools you’ll want to have on hand:
- Screwdriver set
- Wire cutters/strippers
- A multimeter (for checking electrical connections)
- Smart Home Hub (like Samsung SmartThings or Amazon Echo)
- Smartphone or tablet for app downloads
- Tape measure
Having the right tools will make your life easier and save you time. I remember the first time I attempted to install a smart light system and didn’t have a tape measure—measuring with my phone just didn’t cut it!
- Choose Your Hub
A hub is the brain of your smart home. It connects all your devices and allows them to communicate. Research which hub is best for your needs. I started with SmartThings because of its compatibility with various devices, but many DIYers swear by the Amazon Echo for its voice control features. Make sure to follow the manufacturer's instructions to set it up correctly. A common mistake is assuming one hub will work for everything, so always check compatibility upfront.
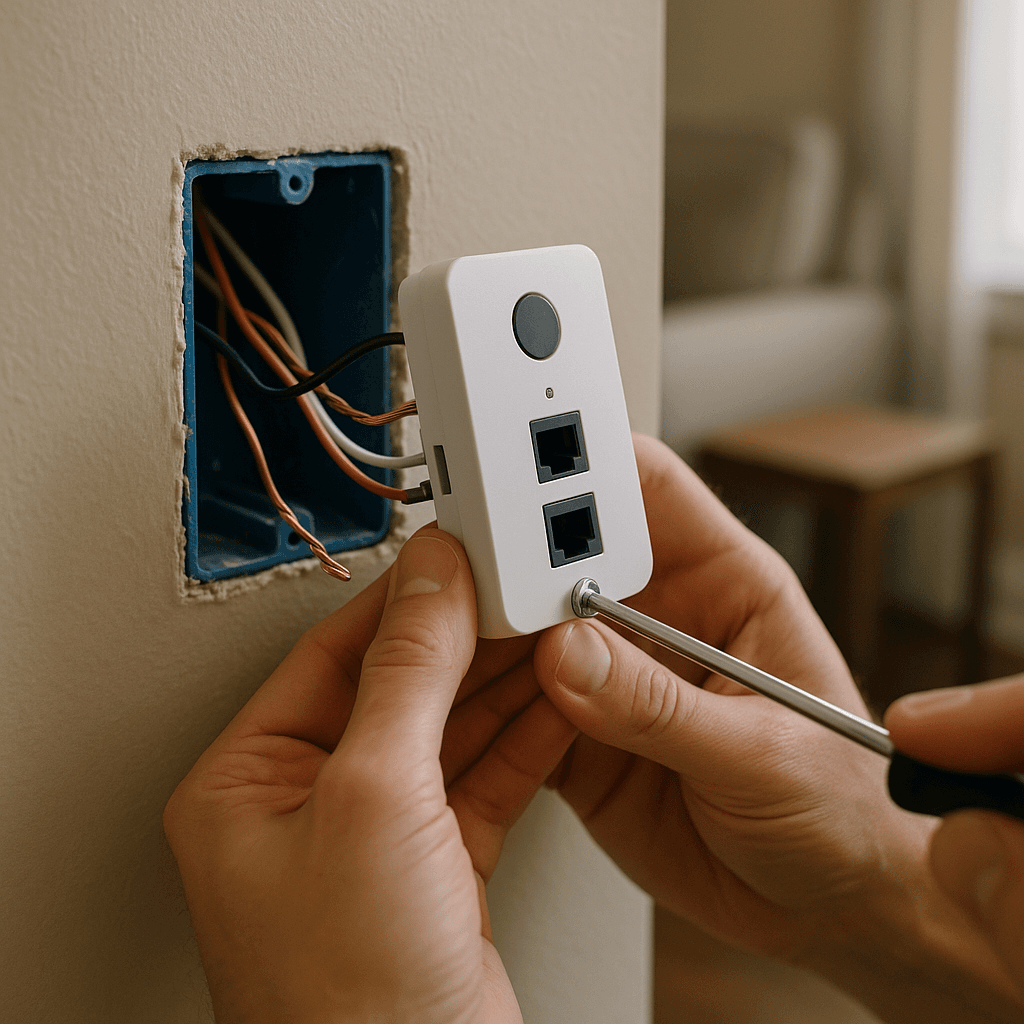
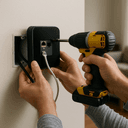
- Install Your Devices
Follow the instructions for each device carefully. For example, when installing smart bulbs, ensure the power is off to avoid shocks. I once made the mistake of trying to install a smart switch without turning off the power, which could have led to a serious injury. Always prioritize safety! I recommend using a voltage tester before touching any wires to ensure they’re not live.
- Configure Your Apps
Most smart devices come with an app. Download it and follow the on-screen instructions to connect your devices. Make sure your phone is connected to the same Wi-Fi network as your devices to avoid pairing issues. I had a frustrating hour trying to connect a smart lock because I didn’t realize my phone was on the wrong network. Double-checking your Wi-Fi connection can save you a lot of time.
- Set Up Routines and Automations
Once everything is installed, take time to create routines. For instance, setting up a morning routine where your lights gradually brighten can make waking up easier. This is where the real magic happens! It's amazing to see how these automations can simplify your daily routine, like having your coffee pot start brewing just as your alarm goes off!
Troubleshooting & Fix-ups
Even with the best plans, things can go wrong. Here are some common issues you might encounter and how to fix them:
- Device Not Responding
If your device isn’t responding, first check your Wi-Fi connection. I’ve found that a simple router restart can fix many issues. If that doesn’t work, try resetting the device according to the manufacturer’s instructions. Also, ensure the device is within range of your Wi-Fi; sometimes a weak signal can cause headaches.
- App Crashes
Sometimes the app can be buggy. Make sure it’s updated to the latest version. If it keeps crashing, uninstall and reinstall it. This often clears up any lingering issues. I had an app crash during a setup once, and it turned out I just needed to clear the cache.
- Compatibility Issues
If a device isn’t working with your hub, double-check compatibility on the manufacturer’s website. I’ve had devices that looked great on the shelf but didn’t play well with my hub, which was frustrating. Always check reviews or forums for user experiences before you buy.
Common Mistakes & How to Avoid Them
In my years of DIYing, I’ve seen a lot of common mistakes that can easily be avoided:
- Skipping the Research
Many DIYers rush into purchases without researching compatibility. Always double-check that the devices you’re buying will work together. I once bought a smart bulb only to find out it wouldn’t connect to my hub. It’s like trying to use a foreign plug without an adapter—it just doesn’t work!
- Neglecting Security
Protect your network credentials and follow device pairing security best practices. I’ve learned the hard way that not securing your devices can lead to unwanted access. Always change default passwords and enable two-factor authentication when available. A securely set up network will save you a lot of headaches down the road.
- Overcomplicating Setups
Start small. I made the mistake of trying to set up multiple devices at once, which led to confusion. Focus on one project at a time, like starting with smart lighting before adding security cameras.
Pro Tips & Lessons Learned
From my experiences, here are some pro tips that can save you time, money, or frustration:
- Plan Your Layout
Before buying devices, sketch out where you want everything to go. This will help you avoid unnecessary purchases and ensure optimal device placement. I once bought a camera that turned out to be too far from the router to work effectively—plan ahead!
- Label Everything
If you’re dealing with wires and multiple devices, label them as you go. I use painter’s tape and a marker to keep track of what’s what, which saves me a lot of headaches later. It’s also helpful for troubleshooting down the road.
- Stay Updated
Smart home technology is ever-evolving. Subscribe to newsletters or follow forums to stay updated on the latest devices and best practices. You never know when a new update could enhance your existing setup.
Budget & Time Signals
Setting up a smart home can vary significantly in cost, depending on your goals and the devices you choose. Here’s a rough estimate of what you might spend:
- Basic Setup (Smart Bulbs, Thermostat): $100 - $300
- Moderate Setup (Security Cameras, Smart Plugs): $300 - $700
- Advanced Setup (Full Home Automation): $700 and up
What drives costs up or down? The brand of the devices, the complexity of installation, and whether you need any additional tools or hubs. You can phase your projects over time, starting with the essentials and adding more as you go. Remember, it’s easier to budget for one project than to go all-in at once.
When to Call a Pro
There are times when it’s best to call in a professional. If you encounter any of the following situations, consider reaching out for help:
- Complex Wiring
If you’re dealing with electrical wiring that seems beyond your skill level, it’s better to hire an electrician. Safety should always come first! I’ve seen too many DIYers get in over their heads with wiring.
- Security Concerns
If you’re unsure about how to secure your network or devices, consulting a professional can save you from potential security risks. Don’t hesitate to ask for help if you’re feeling out of your depth.
- Frustration Level
If you find yourself consistently frustrated and not making progress, it might be a sign that you need help. There’s no shame in reaching out to someone who can assist you. Sometimes a fresh set of eyes can solve a problem you’ve been battling with for hours.
Conclusion
As you embark on your smart home journey, remember to take it one step at a time. Setting up your home with smart devices can be rewarding, and with the right tools and approach, it can save you time and enhance your daily life. The key wins from this weekend project could be the beginning of a more connected and efficient home.
So, what’s the next step? Take a moment today to assess your needs and gather your tools. You’ve got this!
Happy DIYing!
Advanced Tool Kit Essentials for Smart Home Projects
When diving into smart home projects, specific tools can save you time and effort. Here are a few essentials:
Multimeter
A multimeter is crucial for diagnosing electrical issues. Set it to ‘AC Voltage’ when checking outlets, and remember to always start with the highest range to avoid damaging the device. I once misjudged a low-voltage circuit and ended up blowing the fuse on my multimeter. Lesson learned: start high!
Smart Tools
Consider investing in smart tools like a Wi-Fi-enabled laser level. They can help ensure your installations are perfectly aligned. I used one for hanging a series of smart bulbs, and the precision made all the difference in their placement.
Surface Preparation for Smart Home Devices
Before installing any device, especially smart sensors, prepare the surface by cleaning it thoroughly with isopropyl alcohol. This ensures better adhesion for sticky mounts. I skipped this once and my sensor fell within a week, causing a frustrating troubleshooting session. A clean surface can make a world of difference in how well your devices stick and function.
Pro Tips for Common DIY Challenges
Wiring Issues
If you’re installing a smart thermostat and it doesn’t power on, double-check your wiring. I once connected wires in the wrong order and had to troubleshoot for hours. Tip: take a photo of your original setup before making changes; it’s a lifesaver if you need to revert!
Case Study: The Smart Lock Installation
A friend of mine attempted to install a smart lock but misaligned the bolt with the strike plate. This led to a lot of frustration. To fix it, I suggested using a chisel to carefully adjust the strike plate positioning. Now, it works seamlessly, and my friend learned the value of precise measurements!
Tech Setup
For connecting multiple smart devices, ensure your Wi-Fi router supports the required bandwidth. I had a situation where my smart bulbs kept disconnecting due to weak signals. Upgrading to a dual-band router made a significant difference in connectivity and stability. This is particularly important if you have a larger home with multiple floors.
With these tools and tips, your DIY projects will run smoother than ever!
Recommended Gear
Disclosure: As an Amazon Associate, we may earn from qualifying purchases at no extra cost to you.
Common Mistakes
- Skipping research on device compatibility before purchasing.
- Neglecting security best practices, risking unauthorized access.
- Overcomplicating setups by installing multiple devices at once.
)