What You Need for Outdoor Upgrades for DIY Cleaning & Maintenance Your Neighbors Will Notice (Winter, December)
Tools Needed
Materials Needed
Safety Tips
- Wear gloves and safety goggles to protect skin and eyes from chemicals and debris.
- Ventilate the area well when using cleaners with strong fumes.
- Keep pressure washer nozzle at least 12 inches away from surfaces to avoid damage.
- Test cleaning products on a small inconspicuous area before full application.
- Avoid working in cold, wet, or rainy weather for effective cleaning.
- Do not rush drying process to prevent mold and mildew growth.
Before You Start / What to Know Up Front
Hey there, fellow DIY enthusiasts! If you’re like me, you take pride in the appearance of your home, especially when it comes to the outdoors. As winter rolls in, it’s the perfect time to tackle some cleaning and maintenance projects that not only spruce up your home but also keep it safe and functional through the harsher months. The first winter I spent in my new house, I was shocked at how quickly grime and dirt can build up on patios, decks, and outdoor furniture. I learned the hard way that if you let these things slide, you can end up with bigger problems down the line.
This guide is for anyone looking to upgrade their outdoor space with effective cleaning methods that your neighbors will definitely notice. Whether you’re a seasoned DIYer or just starting, I’m here to help you navigate through the steps, tools, and tricks you need to bring your outdoor areas back to life. Get ready to roll up your sleeves and get to work!
Method Overview
So, what approach are we taking today? We’re going to focus on a thorough cleaning routine that will cover your patio, outdoor furniture, and any other surfaces that might need some love. This method is effective because it combines deep cleaning with preventive maintenance, ensuring that not only do your surfaces look great, but they’re also protected against winter weather.
However, it’s worth noting that this approach might not be suitable for all surfaces. If you’re dealing with delicate materials like certain types of wood or fabrics that can be damaged by harsh chemicals or high-pressure washing, stick to gentler methods. Always check the manufacturer’s instructions if you’re unsure; trust me, learning this the hard way can be costly.
Deep Step Detail
Ready to dive in? Here’s the step-by-step guide to get your outdoor areas looking fantastic.
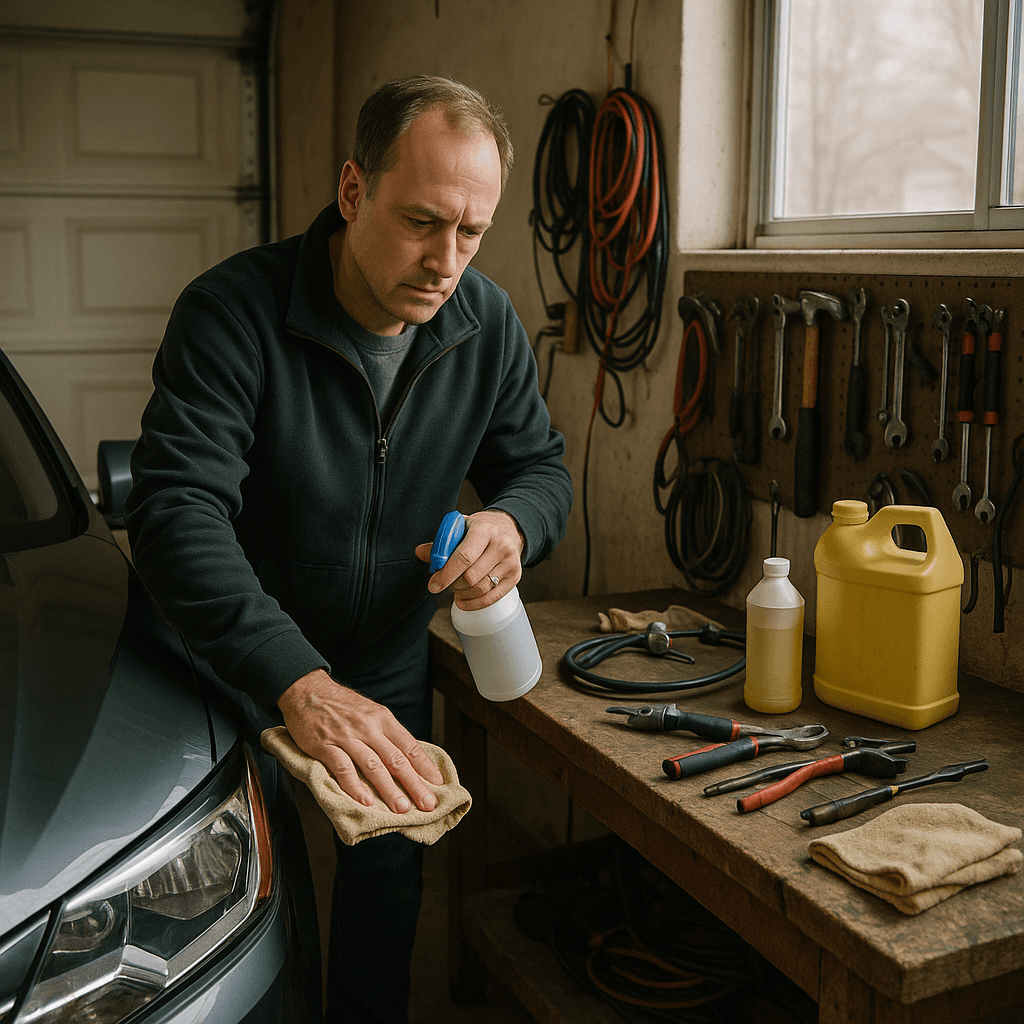
Step 1: Gather Your Supplies
First things first, gather all the supplies you’ll need. You’ll want:
- A good quality outdoor cleaner (make sure it’s suitable for the surfaces you’re cleaning)
- A sponge or scrub brush (soft bristle for delicate surfaces)
- A pressure washer or garden hose with a spray nozzle
- A bucket
- A broom or leaf blower
- Gloves and safety goggles (to protect yourself from chemicals and debris)
Once you’ve got everything together, you’re ready to start! I find that having everything organized in a tote helps save time and keeps your workspace tidy.
Step 2: Clear the Area
Before you start cleaning, clear away any furniture, planters, and debris from the area. This isn’t just about making things look tidy—it’s crucial for safety. I can’t tell you how many times I’ve tripped over a stray chair leg or knocked something over while cleaning. Plus, having a clean slate makes your job much easier. Don’t forget to check for any loose items, like garden tools or toys, that could trip you up.
Step 3: Sweep or Blow Debris
Using a broom or a leaf blower, remove all loose dirt, leaves, and debris. This step is vital because it prevents scratching surfaces when you start scrubbing. If you skip this, you might end up grinding dirt into the surface, which can cause damage. I once learned this lesson the hard way on my deck, where I ended up with scrapes that took hours to repair.
Step 4: Apply Cleaner
Mix your outdoor cleaner with water in a bucket according to the manufacturer’s instructions. Using a sponge or scrub brush, apply the cleaner to your surfaces. Work in small sections and let it sit for a few minutes to really cut through the grime. Be sure to wear gloves to protect your skin from harsh chemicals, and if you’re using a cleaner with strong fumes, ventilate the area well. If you notice a strong chemical smell, step back and allow for some fresh air.
Step 5: Scrub Away
After allowing the cleaner to sit, grab your brush and start scrubbing! Use circular motions to lift dirt and stains. If you’re dealing with a lot of built-up grime, you might need to apply a little extra elbow grease. Just remember to be gentle on any delicate surfaces; you don’t want to cause any damage. I’ve seen too many DIYers go too hard and end up ruining their furniture finishes.
Step 6: Rinse Thoroughly
Using your pressure washer or garden hose, thoroughly rinse off the cleaner and any loosened dirt. This step is important because leftover cleaner can lead to slippery surfaces, especially when wet. If you’re using a pressure washer, keep the nozzle at least 12 inches away from the surface to avoid damage. I’ve accidentally stripped paint off a fence by getting too close, so be cautious!
Step 7: Drying Time
Let everything dry completely before replacing any furniture or decorations. This helps prevent mold and mildew growth, which can be a real problem in humid winter months. While you’re waiting, take a moment to inspect your furniture and surfaces for any repairs that might need to be done. I often find that a little maintenance can go a long way!
Step 8: Protect Your Surfaces
Once everything is dry, consider applying a protective sealant on wooden surfaces or a weatherproof cover on furniture. This extra step will help extend the life of your outdoor pieces and keep them looking great through the winter. I always use a quality sealant on my wooden deck; it’s saved me from costly repairs down the line.
Troubleshooting & Fix-ups
Even the best-laid plans can go awry, so let’s talk about some common issues you might face and how to fix them.
- Stains Not Coming Out: If you find that some stains are stubborn, don’t fret! You can try a stronger cleaner or let the cleaning solution sit longer. Just keep an eye on the surface to avoid damage. I’ve had great success with oxygen bleach for tougher stains.
- Surface Damage from Pressure Washer: If you accidentally damage a surface with your pressure washer, don’t panic. Depending on the material, you might be able to sand and refinish it, or simply repaint it. Just make sure to check the manufacturer’s recommendations first.
- Mold and Mildew: If you notice mold or mildew after cleaning, mix a solution of vinegar and water to treat it. Spray it on the affected areas, let it sit, and rinse thoroughly. I wish I had known this simple trick earlier—it would have saved my patio furniture from some serious discoloration!
- Over-scrubbing: If you’ve scrubbed too hard and removed finish or paint, you may need to repaint or refinish that area. Always start with a gentle touch and increase pressure as needed. I’ve seen many DIYers make this mistake, resulting in more work than necessary.
Common Mistakes & How to Avoid Them
As someone who has made my share of mistakes over the years, I can tell you there are a few common pitfalls to watch out for.
- Skipping the Cleaning Product Test: Always test your cleaner on a small, inconspicuous area first. I once ruined a beautiful wooden patio table by using a cleaner that was too harsh. Prevent this by always checking your labels.
- Not Ventilating: If you’re working with strong cleaners, make sure your area is well-ventilated. I learned this the hard way when I felt dizzy after a long cleaning session without proper airflow. Open windows or doors if possible!
- Neglecting Protective Gear: Don’t skip gloves or goggles! Even if you think a product is mild, it’s better to be safe than sorry. I’ve had my hands sting from a cleaner that I thought was harmless. Protect yourself!
- Rushing the Drying Process: Patience is key! If you put furniture back too soon, you could trap moisture, leading to mold growth. Always allow sufficient drying time before replacing items. I usually set a timer to remind myself.
- Ignoring Weather Conditions: If it’s too cold or wet outside, cleaning may not be effective. I’ve had days where I thought I could clean only to be thwarted by rain or icy surfaces. Check the forecast before starting!
- Using the Wrong Tools: Make sure you’re using the right tools for the job. I’ve made the mistake of using a scrub brush on a delicate surface, which led to scratches and damage. Always double-check your tool choices.
Pro Tips & Lessons Learned
Here are some smaller tricks I’ve picked up over the years that can save you time and frustration.
- Use Baking Soda for Tough Stains: If you encounter tough stains, sprinkle some baking soda on the area before scrubbing. It acts as a gentle abrasive without damaging the surface. This has saved me countless hours on stubborn messes.
- Invest in Quality Tools: Good tools make a world of difference. I always reach for sturdy scrub brushes and quality cleaners that are safe for my surfaces. It saves time and effort!
- Regular Maintenance: Instead of waiting until things get grimy, commit to a seasonal cleaning schedule. This keeps your outdoor areas looking fresh and prevents long-term damage. I find a quick clean-up every few months makes a huge difference.
- Use a Pressure Washer Wisely: If you’re using a pressure washer, start with the lowest pressure setting and gradually increase as needed. This way, you reduce the risk of damaging surfaces. I once blew a hole in a fence by going all out too quickly!
- Create a Cleaning Routine: Make a checklist of what you need to clean and when. I usually do a quick maintenance cleaning before the winter months to ensure everything is ready to withstand the weather. This keeps me organized and on track.
- Stay Organized: Keep your supplies in a dedicated area so you can grab everything you need without wasting time searching. I have a rolling cart that holds my cleaning supplies—it’s a game changer!
Budget & Time Signals
When it comes to budgeting for your outdoor cleaning and maintenance, it can vary quite a bit depending on the size of the area and the condition of your surfaces. Here’s a general idea of what to expect:
- Cleaning Supplies: Expect to spend around $50-$100 on cleaning supplies, depending on what you need. Quality cleaners and tools can be a bit pricier, but they tend to last longer. It’s worth the investment!
- Time Commitment: Plan to spend at least a half-day on cleaning, especially if you’re tackling multiple areas. If you can, split the workload over a couple of weekends to make it more manageable. I find it helpful to set aside an entire Saturday for this.
- Additional Repairs: If you find that surfaces need repairs or sealing, budget an extra $100-$300 depending on materials and labor involved. I always prepare for a little extra just in case.
- Cost-Saving Tips: You can save money by doing the cleaning yourself instead of hiring a pro. Just be sure to do your research on the products you use to avoid costly mistakes. I’ve saved a bundle over the years!
- Phasing Projects: If your budget is tight, consider phasing your projects. Focus on one area at a time, like cleaning the patio this weekend and tackling the furniture next month. It makes the workload feel less daunting.
When to Call a Pro
While many outdoor cleaning and maintenance tasks are DIY-friendly, there are times when it’s best to call in a professional. Here are some situations to watch for:
- Extensive Damage: If you discover severe damage to your surfaces or structures (like rotting wood or loose tiles), it’s time to bring in an expert. I learned to recognize these signs early on to avoid bigger headaches later.
- Complex Repairs: If you find that repairs are beyond your skill level, don’t hesitate to call a pro. It’s better to pay for help than to risk causing further damage. I’ve made that mistake before and wished I hadn’t!
- Safety Concerns: If you’re dealing with high areas or heavy furniture that requires lifting, consider hiring help. Safety should always come first. I always err on the side of caution when it comes to heavy lifting.
- Specialized Cleaning Needs: If you have delicate materials that require specialized care or cleaning methods, it’s worth getting a professional opinion. I once had a beautiful stone patio that needed a specific treatment—definitely not a DIY job!
- Time Constraints: If you’re short on time or overwhelmed with other responsibilities, hiring a pro can relieve stress and ensure the job gets done right. Sometimes it’s just not worth the hassle.
Conclusion
In conclusion, giving your outdoor spaces a good cleaning and maintenance upgrade this winter can truly make a difference in your home’s curb appeal. It’s a rewarding process that not only beautifies your surroundings but also protects your investments from the harsh elements. Remember to take your time, use the right tools, and don’t hesitate to ask for help when needed. Now that you’re equipped with this knowledge, I encourage you to take the first step today—gather your supplies, and start planning your cleaning day! Your neighbors will surely notice the difference, and you’ll feel proud of all your hard work.
Recommended Gear
Disclosure: As an Amazon Associate, we may earn from qualifying purchases at no extra cost to you.
Common Mistakes
- Skipping the cleaning product test on a small area leading to surface damage.
- Not ventilating the area when using strong cleaning chemicals.
- Neglecting to wear protective gloves and goggles.
- Rushing to replace furniture before surfaces are fully dry.
- Using the pressure washer too close and damaging surfaces.
- Ignoring weather conditions and cleaning during unsuitable weather.
)