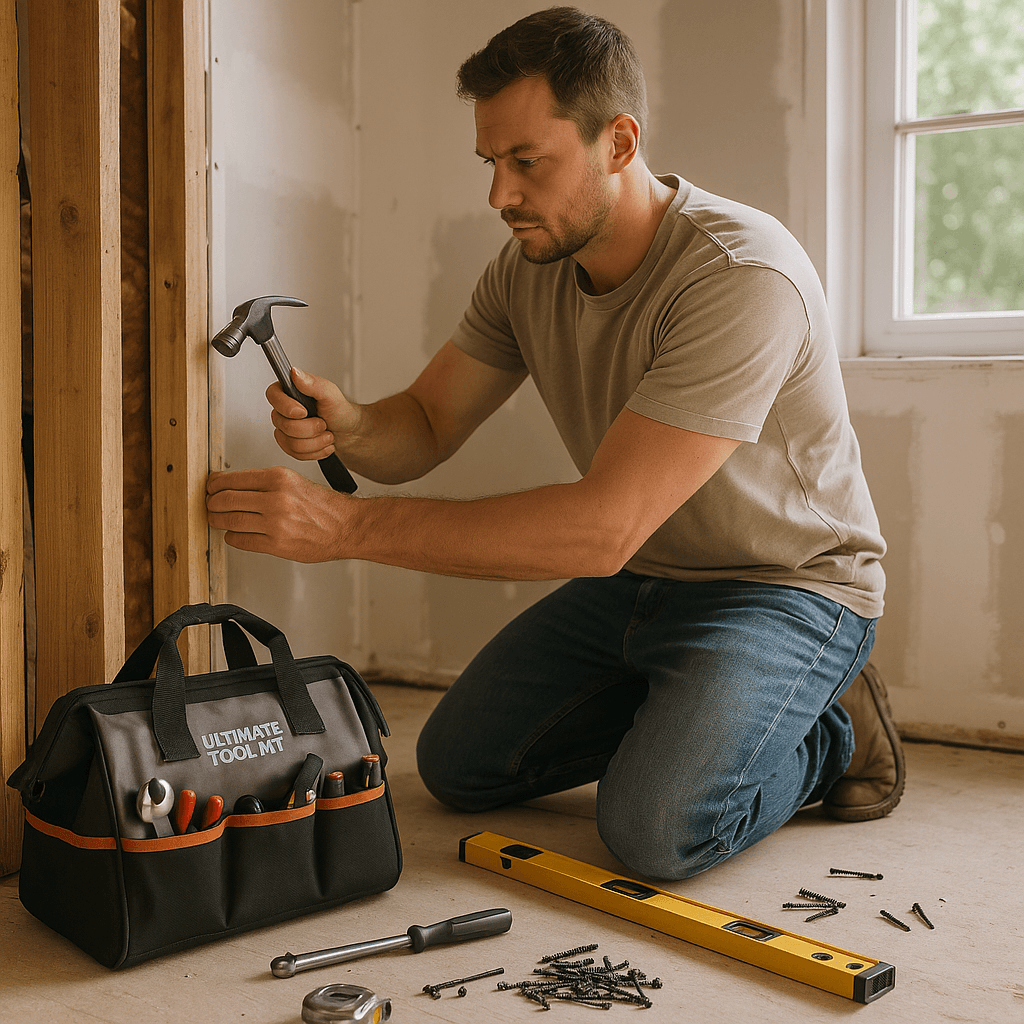
Ultimate Tool Kits for Home Repair & Maintenance for Safer Projects (Winter, December, Year-End)
Tools Needed
Materials Needed
Safety Tips
- Always comply with local building codes and permit requirements before starting projects.
- Wear appropriate safety gear including goggles, gloves, and dust masks especially when cutting or sanding.
- Keep your workspace tidy to avoid tripping hazards and accidents.
- Ensure proper ventilation when using power tools indoors.
Ultimate Tool Kits for Home Repair & Maintenance for Safer Projects (Winter, December, Year-End)
If you’re like me, winter is the perfect time to tackle home repair projects. There’s something cozy about being indoors, improving your home’s safety and functionality. But before you dive in, let’s ensure you have the right tools at your disposal. This guide is packed with everything you need to know to build a tool kit that rivals the pros.
Quick Answer
To create a solid tool kit for home repairs, focus on essential hand tools, power tools, and safety gear. Prioritize quality over quantity and choose tools that fit your specific repair needs. Don’t forget a good toolbox for organization!
Experience Context
I remember my first attempt at fixing a leaky faucet. Full of confidence, I armed myself with a wrench and a YouTube video. Halfway through, I realized I didn’t have the right size wrench. I thought I could wing it, but I ended up stripping the nut. What started as a simple fix quickly turned into a much bigger problem. I had to call a plumber, which was a painful tradeoff I could have avoided with a better tool kit.
Before You Start
Underestimating the importance of having the right tools is easy. Many jump into projects with whatever they have on hand, only to discover they lack something essential. Think about the types of repairs you commonly tackle—plumbing, electrical, or general maintenance—to tailor your kit accordingly. Measure your space! Consider where you’ll store these tools; a cluttered garage isn’t just an eyesore; it can lead to accidents or misplacing tools when you need them most.
Method Overview
In this guide, we’ll walk through the steps to build a comprehensive tool kit for home repair and maintenance. We’ll cover hand tools, power tools, and safety gear. If you’re dealing with specialized projects, like extensive renovations or major electrical work, consulting a pro is a smart move.
Deep Steps
1. Assess Your Needs
- Think about the repairs you often perform. Are you fixing leaky pipes, hanging shelves, or doing basic electrical work?
- Write a list of tasks you tackle regularly to help determine the tools you need.
2. Start with Hand Tools
- Essential hand tools include:
- Hammer: A good quality, claw hammer is versatile for many tasks.
- Screwdrivers: Get a set that includes both Phillips and flat-head in various sizes.
- Wrenches: An adjustable wrench and a set of socket wrenches will cover most plumbing and mechanical jobs.
- Pliers: Needle-nose and regular pliers are a must for gripping and twisting.
- Purchase these at a local hardware store or online. Look for brands with good reviews for durability.
3. Invest in Power Tools
- Key power tools to consider:
- Cordless drill: A must-have for drilling holes and driving screws. Get one with a good battery life.
- Circular saw: Great for cutting wood and making precise cuts.
- Sander: If you plan to do any woodworking or refinishing, a sander will save you a ton of time.
- Read product specifications and user reviews to ensure you’re getting the right tools for your projects.
4. Safety Gear is Crucial
- Don’t skip on safety gear!
- Safety goggles: Protect your eyes from debris while cutting or drilling.
- Ear protection: If you’re using loud power tools, wear earplugs or noise-canceling headphones.
- Dust masks: Keep yourself safe from inhaling dust during sanding or demolition work.
- Investing in good safety gear can prevent injuries and make your work more enjoyable.
5. Organize Your Tools
- Get a sturdy toolbox or tool chest to keep everything organized.
- Use drawer organizers for small items like screws and nails.
- Label sections for easy access.
6. Maintenance and Care
- Regularly check tools for wear and tear.
- Clean and oil them to keep them in good condition.
- Replace any broken tools immediately to avoid accidents.
Decision Points
Hand Tools: Quality vs. Quantity
When I was starting to build my kit, I faced the choice between buying a complete set of cheaper tools or investing in fewer, higher-quality ones. I opted for quality. They last longer, perform better, and ultimately save money since I don’t have to replace them as often.
Power Tools: Corded vs. Cordless
For my drill, I debated between corded and cordless models. I chose cordless for flexibility; I can move around freely without searching for an outlet. However, if you plan on doing heavy-duty work for long periods, a corded drill may offer more power and consistent performance.
Safety Gear: Buy Cheap or Invest?
I once went for the cheapest safety goggles, thinking they’d suffice. They scratched easily and were uncomfortable. This time, I invested a little more for a comfortable, durable pair. Good safety gear is not the place to cut corners.
Troubleshooting & Fix-Ups
Problem 1: Stripped Screws
If you find yourself stripping screws, use a rubber band. Place it over the stripped screw and then try again with your screwdriver for extra grip.
Problem 2: Tools Rusting
If your tools start to rust, clean them with a mixture of vinegar and baking soda. Scrub the rust spots, rinse, and dry thoroughly. To prevent future rust, apply a thin layer of oil.
Problem 3: Battery Issues
If your cordless tools aren’t holding a charge, check the battery contacts for dirt or corrosion. Clean them with a small brush or cloth. If that doesn’t work, it may be time to replace the battery.
Problem 4: Disorganized Toolbox
If your toolbox is a mess and you can’t find what you need, take everything out and sort it by category. Use small bins or bags for screws, nails, and small parts to save time on future projects.
Common Mistakes & How to Avoid Them
- Skipping Safety Gear: Always wear your safety goggles and ear protection. It’s easy to think, “I’ll be fine,” but accidents happen quickly.
- Buying Cheap Tools: Don’t skimp on quality. It’s better to have a few reliable tools than a whole bunch of cheap ones that break easily.
- Neglecting Maintenance: Regularly check and clean your tools. You’ll save yourself a lot of headaches down the line.
- Not Organizing Tools: Take time to organize your tools. It will make your life easier and help you work more efficiently.
Safety Tips
- Always comply with local building codes and permit requirements. Check before starting any major project.
- Wear appropriate safety gear, including goggles, gloves, and masks, especially when cutting or sanding.
- Keep your workspace tidy to avoid tripping hazards.
- Ensure proper ventilation when using power tools, especially indoors.
Budget & Time Ranges
The costs for building a tool kit can vary widely based on the quality of tools and the types you choose. Here’s a rough breakdown:
- Hand Tools: $100 - $300
- Power Tools: $200 - $600
- Safety Gear: $50 - $150
- Toolbox/Storage: $50 - $200
Time-wise, assembling your tool kit can take anywhere from a few hours to a couple of days, depending on how many trips you need to make to the store.
Stop & Call a Pro
If you encounter any of the following, it’s time to call in a pro:
- Electrical Issues: Flickering lights or burning smells indicate you should not attempt repairs yourself.
- Major Plumbing Issues: Water damage or significant leaks warrant a call to a plumber.
- Structural Problems: Cracks in walls or foundations should prompt a contractor’s assessment.
- Permitting Issues: If you’re unsure about permits for a project, consult a professional to avoid fines.
What I’d Do Differently If I Did This Again
- Skip the unnecessary step of buying every tool at once; buy tools as needed.
- Start with a more comprehensive list of specific tasks to better plan the tools I’d need.
- Upgrade to cordless tools earlier for added convenience and mobility.
- Expect the surprise of needing specialized tools for certain repairs, like a stud finder for hanging heavy shelves.
Building a solid tool kit for home repair and maintenance isn’t just about having the right tools; it’s about being prepared for anything that comes your way. Equip yourself wisely, and you’ll tackle those winter projects with confidence!
Recommended Gear
Disclosure: As an Amazon Associate, we may earn from qualifying purchases at no extra cost to you.
Common Mistakes
- Skipping safety gear which can lead to preventable injuries.
- Buying cheap, low-quality tools that break easily and cost more in the long run.
- Neglecting regular maintenance causing tools to wear out prematurely.
- Failing to organize tools leading to lost time and inefficiency during projects.

)