Expert Tips for Storage Solutions for Home Repair & Maintenance Before the Holidays (Winter, December, Christmas)
)
Materials Needed
Safety Tips
- Use wall anchors when installing pegboards and shelving to prevent falls.
- Follow weight limits on shelves and overhead racks to avoid collapse.
- Consult a professional for storing hazardous materials or large equipment.
- Keep heavier items on lower shelves to maintain stability.
Before You Start / What to Know Up Front
As the holiday season approaches, many of us find ourselves facing the inevitable task of organizing our homes. With family gatherings, decorations, and the chaos of December, creating effective storage solutions for home repair and maintenance becomes essential. I remember the first time I tried to tackle my storage issues before the holidays; I ended up with a mess that took longer to clean up than the actual organizing! Today, I’m excited to share some expert tips that will help you turn your cluttered spaces into functional areas, making your home not only look better but also operate more efficiently.
This guide is for homeowners who are comfortable with basic repairs and maintenance but want those pro-like results without breaking the bank. Whether you’re working with a garage, basement, or simply need to manage tools and supplies, I’ll walk you through the steps, explain the reasoning behind each decision, and help you avoid common pitfalls that could derail your efforts.
Method Overview
The approach I recommend focuses on three main principles: decluttering, categorizing, and utilizing effective storage solutions. We start by decluttering your space, which means sorting through what you have and deciding what to keep, donate, or toss. This is crucial because you can’t organize clutter. Once you’ve pared down your belongings, we’ll categorize items based on their use—this makes finding what you need a breeze. Finally, we’ll explore various storage solutions that fit your space and needs, from shelving to bins, ensuring everything has its place.
This method works well for most home repair and maintenance items, but if you have limited space or unique items that require specialized storage, there might be more tailored solutions needed. If you’re dealing with hazardous materials or large equipment, it’s best to consult with a professional.
Deep Step Detail
Now, let’s dive into the nitty-gritty of creating your storage solutions. Follow these steps to get organized:
1. Declutter Your Space
Begin with a thorough assessment of your storage area. Pull everything out into a central space, like the floor or a large table. Go through each item and ask yourself:
- Do I use this regularly?
- Is it broken or damaged beyond repair?
- Would someone else benefit from this?
As you sort, create three distinct piles: keep, donate/sell, and throw away. This might take a while, especially if you’ve been accumulating items for years, but trust me, the clarity you’ll gain is worth it. The first time I did this, I found tools I had forgotten about and even some that I had duplicates of! Most DIYers I see forget to really evaluate their tools, but taking a moment to reflect can save you from future clutter.
2. Categorize What You’re Keeping
Once you’ve made your decisions, it’s time to categorize the items in your keep pile. Group similar items together, such as:
- Hand tools
- Power tools
- Seasonal decorations
- Maintenance supplies (like paints, adhesives, etc.)
- Gardening supplies
Labeling is key here. You can use a label maker or even just masking tape and a permanent marker. I like to keep my categories broad enough to allow for flexibility but specific enough that I know where everything goes. It’s also helpful to keep a small notebook handy to jot down any additional items you might need to purchase for better organization.
3. Choose Your Storage Solutions
Now that you’ve decluttered and categorized, it’s time to choose your storage solutions. Here’s a list of effective options:
- Shelving Units: Perfect for storing larger items and keeping everything visible. Look for adjustable shelves to accommodate different heights. I recommend metal shelving for heavy-duty items—it's incredibly sturdy.
- Clear Bins or Containers: These are ideal for smaller items. I love clear bins because you can see what’s inside without having to open each one.
- Pegboards: Great for hanging tools and keeping them off the floor. This also makes it easy to grab what you need quickly. I’ve seen too many DIYers skip this step, only to have their tools scattered everywhere.
- Wall-Mounted Racks: Perfect for storing long-handled tools like rakes and brooms.
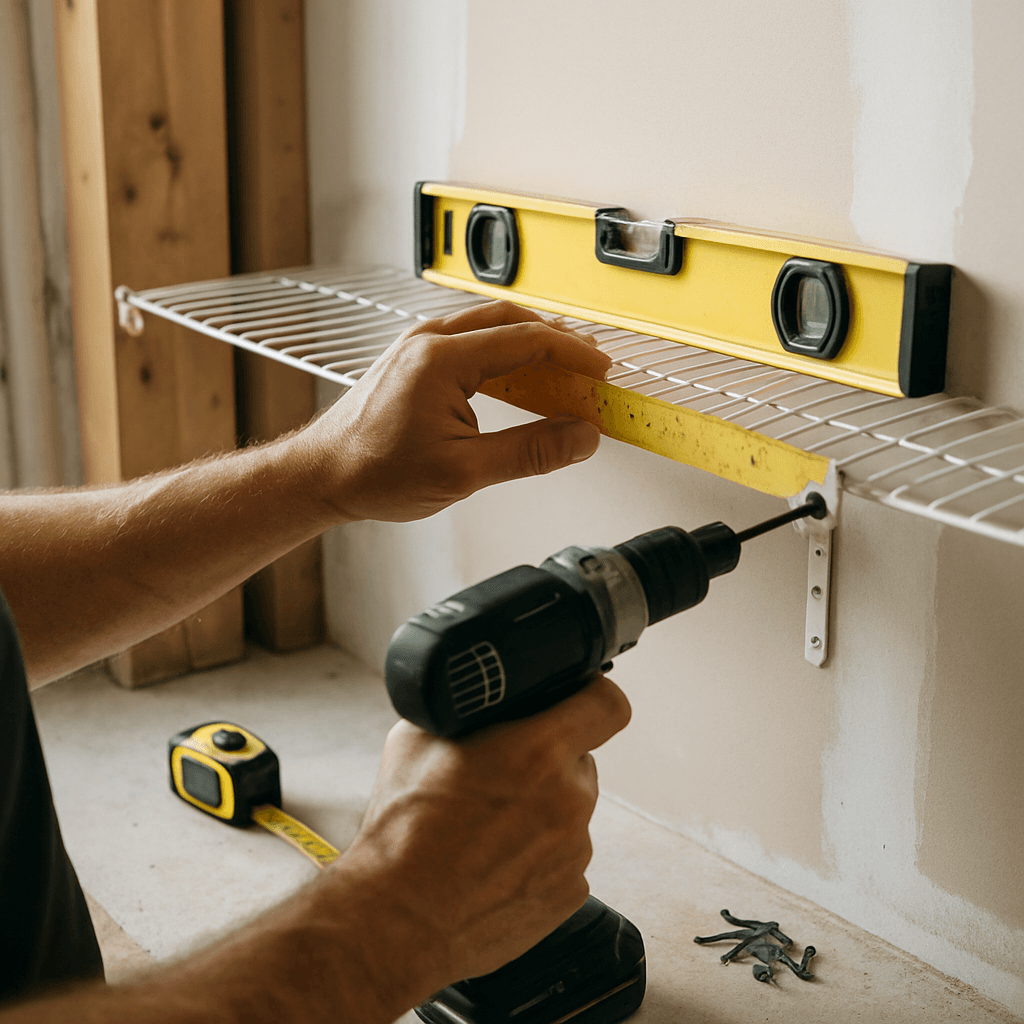
- Overhead Storage: If you’re short on floor space, consider installing overhead racks in your garage or basement. Just be sure to follow weight limits for safety.
4. Implement Your Storage Solutions
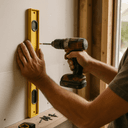
Once you have your storage solutions picked out, it’s time to put them into action. Start by installing shelving units against the wall, ensuring they are anchored securely. For pegboards, I recommend using wall anchors to prevent them from pulling out when you hang heavy tools. I’ve seen too many DIYers skip this step, only to have their pegboards crash down, taking tools with them!
Next, organize your bins and containers on the shelves. Use the labels you created earlier to help with quick identification. Keep frequently used items at eye level and less frequently used items higher up. This will save you time and effort when you need to find something in a hurry.
5. Maintain Your Organized Space
After all your hard work, it’s essential to maintain the organization. Schedule regular check-ins to reassess your space every few months. This might feel tedious, but it’s a small investment of time to keep your home running smoothly. I like to do a quick inventory at the change of each season, especially before the holidays when I know I’ll be pulling out decorations. If you have kids, involve them in this process—it teaches them responsibility and keeps everyone on the same page.
Troubleshooting & Fix-ups
Even the best-laid plans can go awry. Here are some common issues you might run into and how to handle them:
Problem: Overwhelmed by Clutter
If you find yourself getting overwhelmed during the decluttering phase, take a step back. Break it down into smaller tasks. For example, focus on one shelf or corner at a time rather than the entire space. I once spent an entire Saturday trying to tackle everything at once, only to end the day feeling defeated. Setting a timer for 30 minutes can help keep you focused.
Problem: Not Enough Storage Options
If you run out of storage solutions, don’t panic! You can always repurpose items you already have. Old furniture, like a dresser or bookshelf, can be transformed into unique storage solutions. Just make sure they’re sturdy enough to hold what you plan to store. I once turned an old ladder into a rustic shelving unit that works like a charm.
Problem: Items Keep Falling Over
If your bins or containers seem to be toppling over, check to see if they’re too tall or too heavy for the shelves you’ve chosen. Adjust their placement accordingly. Sometimes, I’ve found that simply rearranging items can lead to a more stable setup. Using heavier items on the bottom can also help prevent this issue.
Common Mistakes & How to Avoid Them
In my experience, here are some common mistakes that DIYers make when setting up storage solutions and how to avoid them:
1. Skipping the Decluttering Phase
Many people jump straight into organizing without first decluttering, leading to overcrowded storage spaces. Always take the time to sort through what you truly need. You’ll thank yourself later!
2. Underestimating the Importance of Labels
Failing to label bins and containers can lead to confusion and frustration. Take the extra time to create clear labels for easy identification. I’ve had to dig through bins more times than I care to admit because I didn’t label properly!
3. Overloading Shelves
When people try to store too many items on one shelf, it can lead to collapses or breakages. Stick to weight limits and evenly distribute items. I suggest using a simple bathroom scale to check if your shelves can handle what you’ve loaded them with.
4. Not Using Vertical Space
Neglecting vertical storage options is a huge missed opportunity. Utilize walls and ceilings to maximize your storage potential. If you have a small garage, consider vertical storage racks for tools and supplies.
5. Forgetting to Maintain the System
Once you’ve set everything up, it’s easy to forget about it. Regular maintenance is key! Schedule check-ins every few months to keep everything in order. I set reminders on my phone, which helps me stay on track.
Pro Tips & Lessons Learned
Here are some pro tips I’ve picked up over the years that can save you time, money, and frustration:
1. Use Clear Containers for Visibility
Clear containers help you see what’s inside without digging through. This makes finding what you need quick and easy.
2. Invest in Quality Storage Solutions
While it might be tempting to go for the cheapest option, investing in quality storage solutions can save you money in the long run. Look for sturdy shelving and durable bins that can withstand wear and tear. I’ve learned the hard way that flimsy storage can lead to more headaches!
3. Think Multi-Purpose
Whenever possible, choose storage solutions that serve multiple purposes. For example, a bench with storage inside can double as seating and a place to store items. This is especially useful in smaller spaces.
4. Keep a Donation Box Handy
Having a designated box for items to donate can make decluttering easier. When you find something you no longer need, toss it in the box right away.
5. Get the Family Involved
If you’re organizing a shared space, involve everyone in the process. This not only makes it quicker but can also help maintain the organization since everyone knows where things belong. Plus, it turns into a bonding experience!
Budget & Time Signals
When it comes to budgeting and time, here are some realistic ranges and factors that can drive costs up or down:
Budget Considerations
- Storage Solutions: Expect to spend between $100 to $500, depending on the size and quality of the shelving units, bins, and organizational tools you choose.
- Tools and Materials: If you need tools for installation, like a drill or level, factor in an additional $50 to $150.
- Disposal Fees: If you have a lot to throw away, consider disposal fees which can vary by area.
Time Commitment
- Decluttering: This can take anywhere from a few hours to a full weekend, depending on the size of the area.
- Organizing: Setting up your storage solutions might take an additional few hours.
- Maintenance: Plan for 30 minutes every few months to check in on your organization.
To save costs, consider sourcing used storage solutions or repurposing items you already own. I recently found some great shelving units at a thrift store that worked perfectly in my garage!
When to Call a Pro
While many DIY projects can be tackled with a bit of elbow grease, there are times when it’s best to call in a professional. Consider reaching out for help if:
- You’re dealing with hazardous materials that require special handling.
- You’re unsure about the structural integrity of your storage solutions (like heavy-duty shelving).
- You need custom-built storage solutions that require carpentry skills you don’t possess.
- You’re feeling overwhelmed and need a fresh perspective.
Conclusion
Taking the time to organize your home before the holidays doesn’t just create a more pleasant living space; it can also save you time and stress during a busy season. By following these expert tips for storage solutions for home repair and maintenance, you can create a system that works for you, ensuring everything has its place.
Remember, the goal is to create a functional environment that allows you to enjoy the holidays without the weight of clutter hanging over your head. So, start today! Pick one small area to declutter and organize, and you’ll be amazed at how quickly you can transform your space. Happy organizing!
Recommended Gear
Disclosure: As an Amazon Associate, we may earn from qualifying purchases at no extra cost to you.
Common Mistakes
- Skipping the decluttering phase leading to overcrowded storage.
- Failing to label bins and containers causing confusion.
- Overloading shelves beyond their weight capacity.
- Neglecting to use vertical space effectively.
More in Home Repair