Essential Eco-Friendly Products for Automotive DIY for First-Time DIYers (Winter, December, Christmas)
)
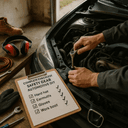
Safety Tips
- Always use jack stands; never rely solely on a jack to support the vehicle.
- Wear gloves to protect your hands from harsh chemicals and sharp edges.
- Use safety goggles when removing wheels to protect your eyes from debris.
- Ensure the vehicle is on a stable, flat surface before lifting.
- Follow torque specifications from the vehicle’s manual to avoid over-tightening bolts.
Essential Eco-Friendly Products for Automotive DIY for First-Time DIYers
As the winter months roll in, many of us are looking at our cars and thinking about the maintenance that needs to be done. For first-time DIYers, the thought of working on your vehicle can be both exciting and daunting. I remember the first time I tried to change my oil during a chilly December afternoon. I was bundled up in layers, fumbling with tools, and hoping not to spill anything on my driveway. But with a bit of planning and the right products, I transformed that cold day into a productive one.
This guide is here to help you navigate the world of automotive DIY with a focus on eco-friendly products. We’ll cover not just the tools you need but also the materials that will help you maintain your vehicle and the environment at the same time. So, grab your gloves, and let’s dive in!
Before You Start / What to Know Up Front
Before you get started, it’s important to set some expectations. Eco-friendly automotive DIY doesn’t mean sacrificing quality or performance; it’s about finding alternatives that are safer for you and the planet. This guide is for intermediate DIYers who may have some common tools and a basic understanding of vehicle maintenance. If you’re ready to roll up your sleeves and get your hands dirty, you’re in the right place. Just remember, safety is paramount! Always support your vehicle on jack stands and never rely solely on a jack. And don’t forget to wear gloves to protect your hands from harsh chemicals.
Method Overview
In this guide, we’ll take a hands-on approach to common automotive tasks using eco-friendly products. We’ll cover everything from oil changes to brake replacements and more. This method works because it emphasizes sustainability without compromising on the quality of your repairs. However, if you’re dealing with complex systems like your vehicle's transmission or electrical systems, it might be best to leave those jobs to professionals. Remember, knowing your limits is just as important as your skills.
Deep Step Detail
Let’s get into the nitty-gritty of your automotive DIY projects. Here are some essential steps to follow for a couple of common tasks:
1. Changing Your Oil
Changing your oil is one of the most straightforward DIY tasks, and it’s a great place to start. Here's how to do it:
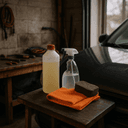
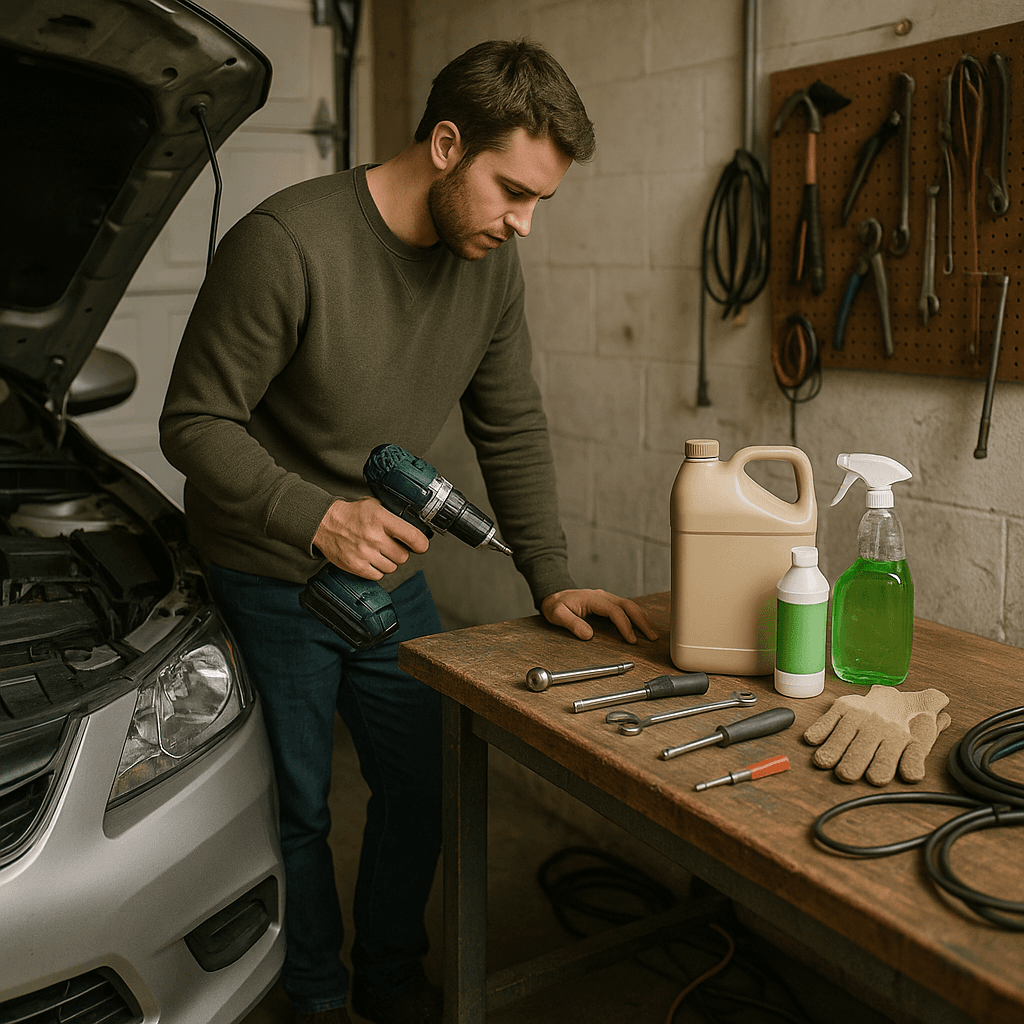
- Gather Your Supplies: You’ll need eco-friendly motor oil, an oil filter, a wrench, an oil catch pan, a funnel, and a jack with jack stands. Look for oils that are biodegradable or made from recycled materials. Brands like Castrol and Valvoline offer eco-friendly options you can find at most auto parts stores.
- Lift the Vehicle: Use your jack to lift the car and securely place it on jack stands. This is crucial for safety; I once saw a friend get a nasty scare when a jack slipped. Always make sure the stands are in good condition and positioned on a stable part of the frame.
- Drain the Old Oil: Place your oil catch pan under the oil pan, remove the drain plug with your wrench, and let the old oil drain completely. Make sure the oil is cool enough to handle to avoid burns. I recommend waiting at least an hour after driving to allow the engine to cool down.
- Replace the Oil Filter: Use your wrench to remove the old oil filter. Apply a bit of new oil to the gasket of the new filter before installing it. This helps create a better seal and makes it easier to remove next time. Be sure to check the old filter for any signs of wear or damage.
- Add New Oil: Replace the drain plug and use a funnel to pour in your eco-friendly motor oil. Check your vehicle’s manual for the correct amount. You don’t want to overfill; trust me, I’ve done that before and it’s a mess to clean up.
- Check for Leaks: After running the engine for a few minutes, check under the vehicle for any leaks.
2. Replacing Brake Pads
Replacing brake pads is another common DIY task that can save you money and improve your vehicle's performance. Here’s how to tackle it:
- Gather Your Supplies: You'll need eco-friendly brake pads, a wrench, a jack, jack stands, a C-clamp, and possibly brake cleaner. Look for brake pads made from organic materials that reduce dust and are less harmful to the environment. Brands like EBC and Akebono offer great eco-friendly options.
- Lift the Vehicle: Securely lift your car with a jack and place it on jack stands. Always double-check that it’s stable before crawling underneath. I can’t stress this enough—once, I had a jack slip, and it was a scary moment.
- Remove the Wheel: Use your wrench to take off the wheel. This is when you might want to wear safety goggles to protect your eyes from debris. I also recommend using a torque wrench when reattaching the wheel to ensure it’s secure but not over-tightened.
- Remove the Caliper: Unbolt the brake caliper and gently slide it off. Be careful not to let it hang by the brake line; use a bungee cord to secure it out of the way if needed. This is often where new DIYers make mistakes—don’t rush this step!
- Replace the Brake Pads: Remove the old brake pads and replace them with the new eco-friendly ones. Make sure they fit snugly. Use the C-clamp to compress the caliper piston back into place. Take your time here; if the piston isn’t compressed enough, the caliper won’t fit back on.
- Reassemble and Test: Reattach the caliper and wheel, lower the vehicle, and pump the brakes a few times before driving to ensure everything is working correctly. This step is crucial; it helps seat the pads properly.
Troubleshooting & Fix-ups
Even seasoned DIYers run into hiccups now and then. Here are some common problems and how to handle them:
- Oil Leaks: If you find oil pooling under your vehicle after an oil change, check to see if the drain plug is tightened properly. If it is, inspect the oil filter to ensure it’s sealed correctly. Sometimes, a little extra torque is necessary, but be careful not to overdo it.
- Squeaky Brakes: If your brakes are squeaking after replacing the pads, it could be due to dust build-up or improper installation. Make sure the pads are seated correctly and consider using brake cleaner to remove any debris. This is a quick fix that can save you a lot of headaches later.
- Low Oil Pressure Light: If this light comes on after an oil change, you might have overfilled the oil. Check the dipstick and drain some oil if necessary. I’ve seen this happen more often than you might think, so always double-check before starting your engine.
Common Mistakes & How to Avoid Them
I’ve seen many DIYers make the same mistakes, especially when they’re new to the game. Here are a few to watch out for:
- Not Using Jack Stands: I can’t stress this enough. Always use jack stands. A jack can fail, and you don’t want to be under a vehicle when that happens. If you’re unsure about the stability of your setup, don’t hesitate to ask for help.
- Over-tightening Bolts: It’s easy to think more torque is better, but over-tightening can strip threads or damage components. Always refer to your vehicle’s service manual for torque specifications. A good torque wrench can save you from this pitfall.
- Ignoring Safety Gear: Whether it’s gloves, goggles, or a mask, don’t skip the safety gear. I learned this the hard way when I got a nasty cut from a sharp edge while working on my car. Trust me, a few extra dollars on safety gear is worth it.
Pro Tips & Lessons Learned
Here are some smaller tricks that I’ve picked up over the years:
- Invest in Quality Tools: Good tools make a big difference. I’ve had cheap wrenches slip and cause more problems than they solve. Look for reliable brands that come with a warranty. It’ll save you money in the long run.
- Keep a Clean Workspace: A clean workspace not only makes it easier to find tools but also reduces the risk of accidents. I always try to tidy up as I go. It’s easier to focus on the task at hand when you’re not tripping over tools.
- Document Your Steps: Taking pictures during disassembly can help you remember how to put things back together. I wish I had done this on my first brake job! It’s a simple habit that can save you time and frustration.
Budget & Time Signals
Budgeting for your automotive DIY projects can be tricky. Here’s a rough breakdown of what you might expect:
- Oil Change: Expect to spend around $30-$70, depending on the oil brand and filter. This can be done in about an hour. If you’re using eco-friendly products, you might see a slight increase in cost, but it’s worth it!
- Brake Pad Replacement: This can range from $100 to $300, depending on the pads and if you need any additional parts. Allow around two to three hours for this task. If you run into issues, like needing to replace rotors, your budget and time frame may need adjustment.
Keep in mind, costs can increase if you need special tools or if you run into unexpected issues. Sometimes it’s worth it to phase projects over time instead of doing everything at once.
When to Call a Pro
Knowing when to call a professional can save you time, money, and frustration. Here are some signs:
- Complex Repairs: If the job involves electrical systems or major engine components, it’s usually best left to a pro. Don’t hesitate to recognize your limits; it’s better to be safe than sorry.
- Lack of Experience: If you feel overwhelmed, don’t hesitate to seek help. There’s no shame in asking a professional for assistance. You’ll learn a lot just by watching them work.
- Safety Concerns: If you’re not confident in your ability to safely lift the vehicle or handle hazardous materials, it’s time to call in an expert. Your safety should always come first.
Conclusion
With the right tools and eco-friendly products, you can confidently tackle your automotive DIY projects this winter. Remember, every step you take not only helps your vehicle but also contributes to a healthier planet. Keep safety at the forefront, learn from your mistakes, and don’t hesitate to lean on professionals when you need to.
So, what’s your next step? Find an eco-friendly product you’ve been wanting to try, and make it part of your next DIY project. You’ll feel great knowing you’re making a positive impact—both on your car and the environment!
Surface Preparation Techniques
One crucial step often overlooked by first-time DIYers is proper surface preparation. Ensure the area is clean and dry before applying any eco-friendly products. For example, using a biodegradable degreaser to clean engine parts can make a significant difference. I once jumped into a project without thoroughly cleaning a component, and the paint didn’t adhere properly, leading to a peeling mess. A simple scrub with a stiff brush and eco-friendly cleaner saved me from a costly redo.
Tool Settings for Optimal Results
When applying eco-friendly coatings, the right tool settings are essential. For spray applications, use a compressor pressure of around 30 PSI and maintain a distance of 8-10 inches from the surface. I learned this the hard way when using too high of a pressure resulted in splatter rather than a smooth finish. Adjusting your spray technique can make a world of difference in the final outcome.
Mini Case Study: Dealing with Paint Runs
A common mistake is applying too thick a layer of eco-friendly paint, leading to unsightly runs. If you find yourself in this situation, allow the paint to dry fully, then lightly sand the area with a fine-grit sandpaper before reapplying a thinner coat. This technique saved my front bumper from looking like it had a bad case of drips! It’s a small adjustment that can lead to a professional-looking finish.
Pro Tips from the Field
- Test in Small Areas: Always test your eco-friendly products on a small, inconspicuous area first to avoid large-scale failures. This is a habit I’ve developed that has saved me from some costly mistakes.
- Cure Times Matter: Allow at least 24 hours for eco-friendly products to cure properly before exposing them to the elements. I once rushed this step, and it resulted in a paint job that didn’t hold up over a rainy week. Patience pays off!
- Keep a Clean Workspace: Maintain a tidy area to prevent contaminants from ruining your projects. A cluttered workspace almost caused me to mix up my eco-friendly sealant with a regular one—thankfully, I caught it just in time.
Recommended Gear
Disclosure: As an Amazon Associate, we may earn from qualifying purchases at no extra cost to you.
Common Mistakes
- Not using jack stands, risking vehicle instability.
- Over-tightening bolts which can strip threads or damage parts.
- Ignoring safety gear such as gloves and goggles.
- Overfilling oil causing low oil pressure light to come on.
- Allowing the brake caliper to hang by the brake line during brake pad replacement.
More in Automotive