Complete Checklist for Outdoor Upgrades for Home Organization Without Breaking the Bank (Winter, December)
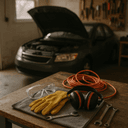
Materials Needed
Safety Tips
- Use tools according to manufacturer instructions.
- Wear protective gear when using saws and drills.
- Ensure work areas are well-lit to avoid accidents.
- Check tools for malfunctions before use.
- Take breaks to avoid fatigue and maintain focus.
Before You Start / What to Know Up Front
Let’s talk about getting your outdoor space organized and upgraded without draining your wallet. Winter is a great time to tackle these projects because you can work on them in a controlled environment—your garage or shed—while the outdoor conditions are less than ideal. This guide is for DIYers like you, who want to optimize their home, garage, or workspace layout while keeping costs low. I remember the first winter I decided to reorganize my garage; I was overwhelmed by clutter and didn’t know where to start. But after making a plan and diving into some hands-on projects, I transformed that space into a functional area that I actually enjoyed using.
Before we dive in, it’s important to have realistic expectations. This isn’t about turning your space into a Pinterest-perfect showcase overnight. Instead, focus on making practical improvements that can evolve over time. You’ll find that with a little creativity and elbow grease, you can make a big difference without breaking the bank.
Method Overview
We’re taking a straightforward approach to outdoor upgrades that includes organizing, decluttering, and improving functionality. This method works because it encourages you to use what you already have and invest in a few key items that can change how you use your space. The best part? This process is flexible; you can tackle it in phases depending on your budget and time constraints.
However, this isn’t a one-size-fits-all solution. If your outdoor space has major structural issues or requires extensive renovations, this guide might not be the best fit. Focus on smaller, manageable upgrades that you can do with basic tools and some creativity.
Deep Step Detail
1. Assess Your Space
Start by taking a good look at your outdoor area. What do you use frequently? What’s just taking up space? Walk around and take notes. This step is crucial because understanding your needs will inform every decision you make going forward. For instance, I once found a beautiful garden bench that I loved but realized it was blocking access to my shed. Understanding your space helps avoid such mistakes.
2. Declutter
Once you’ve assessed your space, it’s time to declutter. Grab some boxes or bags and start sorting items into categories: keep, donate, and toss. Don’t be afraid to let go of things you haven’t used in over a year. I remember my first decluttering session; I was shocked by how many items I was holding onto for no reason. A good rule of thumb is if you haven’t used it since last winter, it might be time to let it go.
3. Create Zones
After decluttering, it’s time to create zones for different activities. For example, designate a gardening zone with tools and supplies, a storage zone for seasonal items, and a workspace for projects. This organization makes it easier to find what you need when you need it. Use painter’s tape to outline these zones on the floor if you want to visualize it before committing. Trust me, it makes a world of difference when you can walk straight to what you need instead of rummaging through everything.
4. Invest in Storage Solutions
Consider purchasing some affordable storage solutions. Things like shelving units, pegboards, and bins can make a world of difference. For instance, I found a sturdy shelving unit at a local hardware store for less than $50 that has held up well. When you’re choosing storage, look for options that are durable and weather-resistant, especially if they’ll be outdoors. If you can, check out second-hand stores or online marketplaces for budget-friendly finds.
5. DIY Upgrades
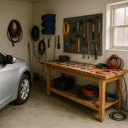
Get creative with DIY upgrades. For example, you can build your own workbench using reclaimed wood or pallets. This not only saves money but adds a personal touch to your space. I once built a workbench with an old door and some cinder blocks, and it’s been one of my best projects yet. Just ensure you have the right tools on hand, like a drill and a saw, to make the process smoother.
6. Final Touches
Finally, add some finishing touches to make the space inviting. Consider adding outdoor lighting, plants, or decorative elements that reflect your personality. Even a simple string of outdoor lights can make a big difference in how you feel about the space. I personally love hanging fairy lights in my outdoor area; it transforms the vibe completely during the evenings.
Troubleshooting & Fix-ups
As with any DIY project, you might run into a few hiccups along the way. Here are some common issues and how to overcome them.
- Space Limitations: If you find you simply don’t have the room for everything, revisit your decluttering step. Be ruthless!
- Budget Overruns: It’s easy to get carried away shopping for storage solutions. Stick to your budget by planning before you shop. Make a list of what you need and don’t deviate.
- Tool Malfunctions: If a tool breaks or doesn’t work as expected, check the manufacturer’s instructions. Sometimes, a simple fix like replacing a battery or tightening a screw can solve the problem.
- Inadequate Lighting: If you’re working in a dimly lit area, invest in some portable work lights. They’re affordable and can dramatically improve your workspace.
- Weather Delays: If it’s too cold or snowy to work outside, take this time to plan and gather materials indoors. Use this downtime wisely, perhaps by sketching out designs or making a detailed list of items you need.
Common Mistakes & How to Avoid Them
Most DIYers, including myself, have made a few common mistakes when organizing outdoor spaces. Here are some that I’ve seen and tips to avoid them:
- Not Measuring: One of the biggest mistakes is not measuring your space before purchasing storage solutions. Always measure twice and buy once. I once ended up with a shelf that was too wide for my garage, which was a frustrating setback.
- Overcrowding: It’s tempting to fill every inch of space, but overcrowding can lead to chaos. Keep things simple and organized in your zones.
- Ignoring Weather Resistance: If you’re putting storage outdoors, make sure it’s weather-resistant. I once bought a beautiful wooden shelf only to have it warp after a rainstorm. Invest in plastic or treated wood for outdoor use.
- Forgetting Accessibility: People often forget to consider how they’ll access things. Make sure frequently used items are easily accessible, while rarely used items can be stored away. I’ve learned the hard way that digging through a pile of seldom-used tools can be a time-waster.
- Neglecting Maintenance: Once your space is organized, don’t neglect it. Set a reminder to check in every few months to keep things tidy. I often find that a quick 30-minute clean-up can prevent a big mess down the road.
Pro Tips & Lessons Learned
Over the years, I’ve learned a few tricks that can save you time, money, and frustration:
- Repurpose Items: Before you buy new storage, look around your home. Old crates, jars, or baskets can be repurposed for storage. I’ve used old mason jars to store screws and nails, keeping them organized and visible.
- Use Vertical Space: Don’t forget about vertical storage! Wall-mounted shelves or pegboards can help you maximize space. I installed a pegboard in my garage, and it’s a game-changer for organizing tools. You can even paint it a fun color to brighten your space.
- Label Everything: Label your bins and shelves. It saves time looking for items and keeps you accountable to put things back in their proper place. I use a label maker, but even handwritten labels work well.
- Take Breaks: Don’t try to tackle everything in one day. Take breaks to avoid burnout and keep your enthusiasm high. I’ve found that working in 1-2 hour bursts with breaks in between keeps my energy up.
- Involve Family or Friends: If you’re feeling overwhelmed, get help from family or friends. It can turn a daunting task into a fun bonding experience. Plus, there’s nothing like a little friendly competition to see who can declutter the fastest!
Budget & Time Signals
When planning your outdoor upgrade projects, consider the budget and time you’re willing to invest. Here’s what you might expect:
- Decluttering: Free, but may take a few hours.
- Storage Solutions: Budget around $50-$200 depending on what you need. Materials for DIY projects can vary widely, so plan accordingly.
- DIY Upgrades: Supplies for a simple workbench or shelving can range from $20-$100. The more you can repurpose, the better.
- Time Commitment: Plan for a weekend or two to complete most projects. You can phase them over several weekends if needed.
Cost can go up if you opt for high-end materials or fancy storage solutions, but sticking to budget-friendly choices will keep costs down. Remember that you can always phase projects over time, tackling the most urgent tasks first.
When to Call a Pro
While many outdoor upgrades are achievable as DIY projects, there are times when it’s wise to call a professional. Here are some clear thresholds:
- Structural Issues: If your outdoor space has significant structural problems like rotting wood or unstable walls, it’s best to consult a pro.
- Electrical Work: If your project involves electrical work, such as installing outdoor lighting, consider hiring a licensed electrician to ensure safety.
- Complex Plumbing: If your upgrades involve plumbing, like outdoor sinks or water features, don’t hesitate to call a plumber. It’s a specialized skill that’s worth the investment.
- Permits: If your project requires permits (like building a deck or large shed), consult a professional to ensure compliance with local codes.
Conclusion
In conclusion, upgrading and organizing your outdoor space can be a rewarding project that doesn’t have to break the bank. By assessing your space, decluttering, creating zones, and making smart investments in storage solutions, you can transform your outdoor area into something functional and inviting. Don’t forget to take your time, involve others when needed, and enjoy the process.
As a next step, I encourage you to grab a notebook and start jotting down your ideas for decluttering and organizing your space. Take that first step today; you’ll be amazed at the difference it can make!
Recommended Gear
Disclosure: As an Amazon Associate, we may earn from qualifying purchases at no extra cost to you.
Common Mistakes
- Not measuring space before purchasing storage.
- Overcrowding zones leading to disorganization.
- Ignoring weather resistance of outdoor storage.
- Forgetting accessibility for frequently used items.
- Neglecting regular maintenance of organized spaces.
)