2025 Trends in Organization Must-Haves for Home Organization You Can Start This Weekend (Winter, December)
)
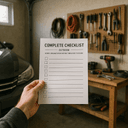
Materials Needed
Safety Tips
- Avoid heavy lifting alone; ask for help to prevent injury.
- Measure spaces before purchasing storage to avoid unsafe overcrowding.
- Use sturdy ladders or step stools when installing shelves or hooks.
- Keep walkways clear during organizing to prevent trips and falls.
Before You Start / What to Know Up Front
If you’re anything like me, stepping into a cluttered room can feel like walking into a battlefield—overwhelming and chaotic. Whether it’s your home office drowning in paperwork, a garage crammed with tools you can never find, or a kitchen that feels like a tornado hit it, the thought of organizing can make anyone want to scream. But here’s the good news: you can tackle it this weekend! This article is designed for hands-on DIYers who want to reclaim their spaces without breaking the bank or hiring outside help. Expect to roll up your sleeves and get a little dirty, but also prepare for that incredible rush of satisfaction when you see the transformation unfold.
Method Overview
This weekend project revolves around decluttering and organizing with a keen focus on maximizing your space efficiently. Our approach breaks things down into three essential steps: sorting, organizing, and maintaining. This method works wonders because it transforms the daunting task of organizing into manageable chunks. It’s not just about stuffing items into bins; it’s about creating a system that fits your unique lifestyle. However, if you’re dealing with a massive overhaul or significant repairs, you might want to consider a more detailed plan or even enlist the help of a professional.
Deep Step Detail
Let’s dive into the nitty-gritty! Here’s a hands-on guide to help you whip your home into shape this weekend.
Step 1: Declutter Your Space
Before you can create order, you need to tackle the clutter head-on.
- Set a timer for 30 minutes. This creates a sense of urgency, helping you focus on getting started.
- Pick one area to start with, like your desk or a specific corner of the garage.
- Create three piles: Keep, Donate, and Trash.
- Be ruthless! If you haven’t touched something in the last year, it’s probably time to say goodbye.
- Take the Donate pile straight to your car to prevent second-guessing your decisions later.
- Dispose of the trash immediately to avoid any emotional attachments.
Step 2: Create an Organization System
Once you’ve decluttered, it’s time to build a system that helps keep things in order.
- Assess what’s left and figure out what needs storage.
- Choose storage solutions that fit your space. You might go for shelving units, stackable bins, or drawer organizers depending on what you’re storing.
- Label everything. It’s astonishing how a simple label can expedite finding what you need.
- Group similar items together. For instance, keep all your office supplies in one container and your tools in another.
- Use vertical space effectively! Don’t just think about the floor; install hooks or shelves to make the most of your walls.
- Place frequently used items at eye level or in easily reachable spots for convenience.
Step 3: Maintain Your Organization
The final step is to keep your space organized over time.
- Spend 10 minutes daily returning items to their designated spots.
- Schedule a monthly check-in to reassess your organization system.
- Don’t hesitate to adjust as needed. If something isn’t working, it’s okay to switch it up!
- Involve your family or housemates in maintaining the organization; make it a team effort to share the responsibility.
- Plan seasonal decluttering sessions to keep clutter at bay.
- Reward yourself for maintaining your organized space; it’ll keep your motivation alive.
Troubleshooting & Fix-ups
As you embark on this organization journey, you might hit a few bumps along the road. Here are some common problems and how to tackle them:
- Not enough storage: If you’re running out of space, consider investing in multi-functional furniture, like ottomans that double as storage or beds with built-in drawers.
- Overwhelmed by the amount of stuff: If the sheer volume of items feels paralyzing, take a breather. Stepping away can give you a fresh perspective and renewed energy.
- Difficulty letting go of items: This happens to the best of us! When struggling, ask yourself if an item truly adds value to your life. If the answer is no, it’s likely time to let it go.
- Items don’t fit in your bins or shelves: Always measure your space before purchasing storage solutions. If something doesn’t fit, consider returning it for a more suitable option.
- Family members not following the system: Involve everyone in the organization process right from the start. This way, they’re more likely to adhere to the new system you’ve implemented.
- Seasonal items taking up space: Store seasonal items in labeled bins and keep them out of the way until you need them again.
Common Mistakes & How to Avoid Them
From my years of DIY experience, I’ve seen people make the same mistakes repeatedly. Here’s how to sidestep them:
- Not measuring your space before buying storage: This can result in purchasing bins or shelves that simply don’t fit. Always measure first to avoid the headache!
- Overcomplicating the organization system: Keep it simple. If your system is too intricate, it won’t be sustainable.
- Ignoring vertical space: Many folks overlook the potential of wall space. Installing shelves or hooks can dramatically enhance your storage capacity.
- Not labeling: If you skip labeling bins or boxes, you might forget what’s inside. Take the time to clearly label everything—trust me, it saves time.
- Trying to organize too much at once: Focus on one area at a time. Tackling everything simultaneously can lead to burnout, which I’ve seen happen far too often.
- Forgetting to maintain: Remember, organization isn’t a one-time gig. Schedule regular check-ins to ensure everything remains in order.
Pro Tips & Lessons Learned
As a seasoned DIYer, I’ve picked up a few tricks along the way that can save you time and frustration.
- Use clear bins: This allows you to see what you have without digging through each box.
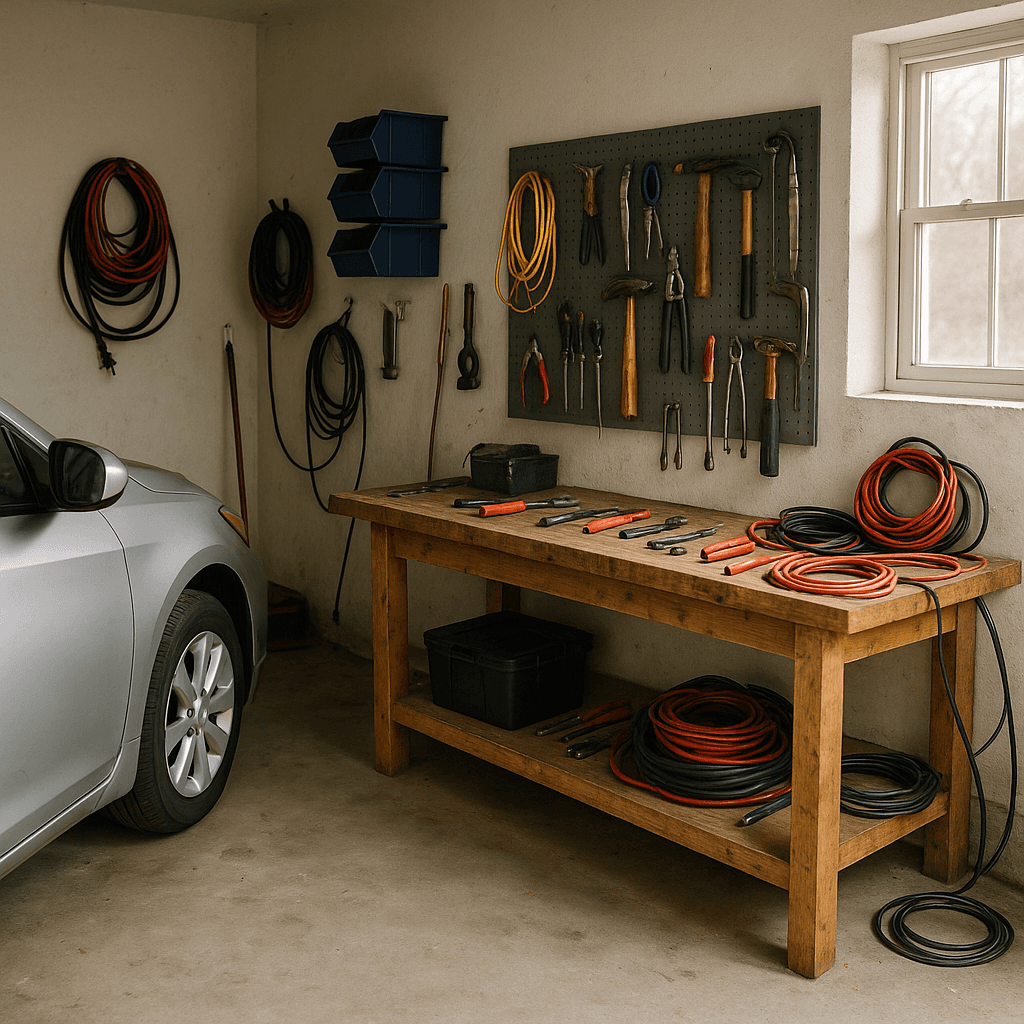
- Utilize pegboards: In workshops or garages, pegboards are fantastic for hanging tools and can be customized as needed.
- Consider a labeling machine: If you’re serious about organization, investing in one can save you time and give everything a polished appearance.
- Repurpose items: Before spending money on new storage solutions, look around your home for items you can repurpose. Old jars can hold office supplies, and unused furniture can serve as storage.
- Stay consistent with your organization: Use the same types of bins and labels throughout your home for a cohesive look and feel.
- Get creative with storage: For instance, use a shoe organizer for cleaning supplies or a spice rack for small tools.
Budget & Time Signals
When you start organizing your space, it’s crucial to have a grasp on potential costs and time commitments. Expect to invest anywhere from $50 to $200, depending on the size of your project and the storage solutions you opt for. Factors that can inflate costs include:
- Purchasing high-end storage solutions.
- Hiring help for heavy lifting or installation.
- Opting for new furniture instead of repurposing what you already own.
- Making impromptu purchases without planning ahead.
In terms of time, you can realistically complete a weekend organization project in about 6-8 hours, depending on how much you need to sort through. If you have a larger home, consider phasing the project by focusing on one room or area at a time.
When to Call a Pro
There are certain scenarios where it’s wise to bring in a professional. If you find yourself facing:
- Significant repairs needed before you can organize (like plumbing or electrical issues).
- A space that requires custom-built storage solutions that are beyond your skills.
- Heavy lifting that could lead to injury or damage if not handled properly.
- An overwhelming amount of clutter that feels impossible to manage alone, don’t hesitate to reach out for support.
Conclusion
At the end of the day, organizing your home is about creating a space that works for you. It’s not merely about aesthetics; it’s also about functionality and peace of mind. Remember, the key steps are to declutter, create a system, and maintain that organization. You’ve got this! Take it one step at a time, and don’t hesitate to adjust your plan as you go. Today, pick one small area to focus on and get started. You’ll be amazed at how much lighter and more inviting your space feels once it’s tidy and organized!
Happy organizing!
Essential Tools for Home Organization Projects
When diving into home organization, having the right tools can drastically improve your efficiency. Here’s a checklist of must-have tools:
- Label Maker: A solid label maker can create custom labels for your bins and shelves. I recommend the Brother P-touch model for its durability and user-friendly interface. Set it to a 14-point font size for clear readability—trust me, you’ll thank yourself later.
- Storage Bins with Clear Lids: Opt for transparent bins to easily see contents. Ensure the lids fit snugly to keep dust out. I learned this the hard way when my friend used opaque bins and spent an hour hunting for his seasonal decorations—don’t let that happen to you!
- Measuring Tape: Always measure your spaces before buying storage solutions. A scenario I faced: I bought a beautiful shelving unit only to find out it didn’t fit due to a door frame. Measure twice, buy once—this motto has saved me plenty of headaches!
Case Study: Closets Gone Wrong
A common blunder is overloading shelves without proper bracket support. I once helped a DIYer who installed floating shelves in their closet but neglected to use wall anchors, leading to a disaster when a heavy box was placed on top. To remedy this, we reinforced the shelves with toggle bolts and redistributed weight more evenly across the structure, preventing future mishaps.
Pro Tips for Effective Organization
- Use Vertical Space: Consider vertical organizers for closets. I utilized vertical shoe racks to store cleaning supplies, making use of otherwise wasted space. This method not only frees up floor space but also improves accessibility.
- Rotate Seasonal Items: Every change of season, I recommend rotating your items. Store winter coats and sweaters in breathable bags at the top of closets during summer months, and vice versa, to keep everything organized and easily accessible.
Recommended Gear
Disclosure: As an Amazon Associate, we may earn from qualifying purchases at no extra cost to you.
Common Mistakes
- Not measuring your space before buying storage solutions.
- Overcomplicating the organization system making it unsustainable.
- Ignoring vertical space potential.
- Skipping labeling of bins or boxes.
- Trying to organize too much at once leading to burnout.
- Forgetting to maintain the organization regularly.
More in Organization