Beginner's Guide to Automotive Gear for Beginner DIY Guides Every DIYer Should Know (Winter, December)
Before You Start / What to Know Up Front
Welcome to the exciting world of DIY automotive projects! If you're reading this, chances are you're a new DIYer eager to learn the ropes of working on your vehicle. That’s fantastic! I remember the first time I decided to tackle a simple oil change on my car. It felt a bit daunting, but the satisfaction of doing it myself was worth every minute spent. This guide is designed to get you started on the right foot with the essential gear you’ll need for winter automotive projects. Expect to learn about the tools, techniques, and safety tips that will help you navigate your DIY journey with confidence.
This guide is perfect for anyone who wants to take their car maintenance into their own hands, especially during the winter months when the cold can make things a bit tricky. Whether you’re changing your oil, rotating your tires, or just checking your battery, having the right tools and knowledge at your disposal will make all the difference.
Method Overview
In this guide, we’ll focus on the fundamental tools and safety practices that every beginner DIYer should know. We’ll cover the basic gear required for common automotive tasks, the approach to using these tools effectively, and when you might consider bringing in a professional. This method works well because it simplifies the process and removes the intimidation factor often associated with automotive work.
However, it’s essential to understand that DIY isn’t for everyone or every scenario. If you’re dealing with complex issues like engine rebuilds or transmission repairs, it might be better to consult with a professional mechanic. But for basic maintenance and repair, this guide will equip you with the knowledge and confidence you need.
Deep Step Detail
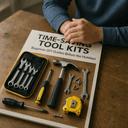
1. Gather Your Tools
To kick things off, you need to assemble a basic toolkit. Here’s what I recommend:
- Socket set: A good socket set with both metric and standard sizes will cover most of your needs. Look for a 3/8-inch drive set as it’s versatile for various jobs. Most DIYers I see forget to check for deep sockets; they can be crucial for reaching bolts in tight spaces.
- Wrenches: A combination wrench set will also come in handy. I like to have a range from 8mm to 19mm, but you might find that some vehicles need specific sizes, so check your manual.
- Screwdrivers: A set of Phillips and flathead screwdrivers is a must. Opt for a magnetic tip if you can find one; trust me, it saves a lot of frustration when dealing with small screws that tend to fall into dark engine crevices.
- Pliers: Needle-nose pliers and standard pliers are crucial for gripping and twisting. Don’t underestimate the power of locking pliers; they can hold parts steady while you work.
- Jack and jack stands: You need a reliable floor jack and jack stands. Never work under a car supported only by a jack; it’s a recipe for disaster. I once had a close call when I forgot to use jack stands, and it was a lesson I won’t forget.
2. Safety First
Before diving into any project, safety should always be your top priority. Wear basic Personal Protective Equipment (PPE), including gloves and safety glasses, to protect yourself from spills and debris. Make sure you’re working in a well-ventilated area, especially if you’re using chemicals like oil or brake cleaner. I learned the hard way that forgetting to wear gloves can lead to messy hands and potential skin irritation. Always keep a fire extinguisher nearby when working with flammable materials, especially in colder months when things can get slippery.
3. Familiarize Yourself with Your Vehicle
Understanding your vehicle is crucial. Before you start any project, take some time to read your car’s manual. It has diagrams and specifications that will help you know where everything is located. Most importantly, it will tell you what type of fluids your car needs and how often to change them. I can’t stress enough how much time I saved by knowing my manual inside and out when I first started. Plus, this knowledge can help you avoid potential mistakes that could lead to costly repairs.
4. Start Small
Begin with simple tasks like changing your oil or replacing your air filter. Set aside a Saturday morning, gather your tools, and follow the steps outlined in your vehicle manual. Don’t rush; take your time to understand each step. The first time I changed my oil, I was surprised at how straightforward it was once I got into it. I recommend taking a photo of the process or making notes, as this can help you remember the steps for next time.
5. Keep Your Workspace Organized
As you work, maintain an organized workspace. Lay out your tools where you can easily access them, and keep track of any screws or small parts in containers. It’s easy to lose a small screw, and trust me, it’s frustrating to have to replace it mid-project. I often use muffin tins or small plastic bins to sort out parts as I go. It keeps everything in order and saves you from unnecessary backtracking.
Troubleshooting & Fix-ups
Even the most experienced DIYers run into hiccups. Here are some common issues and how to handle them:
- Stripped screws or bolts: If you find a screw or bolt that’s stripped, try using a rubber band over the head to get a better grip. If that doesn’t work, a screw extractor can be a lifesaver.
- Oil spills: Accidents happen! If you spill oil, use absorbent materials like kitty litter or rags to soak it up. Clean the area thoroughly with soap and water afterward to avoid slipping. I’ve also used old newspapers in a pinch; they can do the trick.
- Stuck parts: For parts that won’t budge, a little penetrating oil can work wonders. Spray it on, let it sit for a few minutes, and then try again. Patience is key here; don’t force it and risk breaking something. I once broke a bolt by rushing, and it turned a simple fix into a much bigger job.
- Misplacing tools: If you misplace a tool, take a deep breath and retrace your steps. A cluttered workspace can make this a challenge, which is why staying organized is vital. I have a habit of putting my tools back in their designated spots as I go, which helps keep everything in check.
Common Mistakes & How to Avoid Them
As a beginner DIYer, you’re bound to make mistakes, but recognizing them can save you time and headache:
- Ignoring the manual: Many DIYers skip reading the vehicle manual, thinking they can wing it. This can lead to mistakes that might cost you more in repairs. Always refer to the manual before starting any project.
- Rushing through tasks: It’s easy to get excited and rush through a job, but this can lead to oversights. Take your time and double-check your work. I remember missing a step during my first brake job because I was eager to finish.
- Not having the right tools: A common pitfall is starting a task only to realize you’re missing a critical tool. Always gather everything you need before beginning. Make a checklist if you have to; it’s better to take a few extra minutes to prepare than to waste time looking for tools.
- Forgetting to disconnect the battery: If you’re working on anything electrical, always disconnect the battery first. This is a safety measure that can prevent shocks and other issues. I once shocked myself while trying to install a new radio because I skipped this step—definitely not a fun experience.
- Neglecting safety gear: Skipping gloves or safety glasses might seem minor, but it can lead to injuries. Always prioritize your safety gear. I’ve seen too many DIYers get hurt because they thought they were invincible, and that’s not a risk worth taking.
Pro Tips & Lessons Learned
Here are some smaller tricks I’ve picked up along the way that can save you time, money, and frustration:
- Label your parts: When disassembling anything, label or take pictures of parts and their order. It makes reassembly a breeze. Trust me; this tip has saved me from a few head-scratching moments!
- Use a magnet: A magnetic tray can hold screws and small parts, preventing them from rolling away. It’s a simple addition that can save a lot of time. I always keep one handy in my toolkit.
- Warm up your engine: If you’re changing the oil, warm up your engine slightly before draining. This helps the oil flow out more smoothly. Just don’t make it too hot; you don’t want to burn yourself!
- Plan your projects around daylight: If you’re working outside, plan to start your projects during the day. Working in the dark can lead to mistakes and injuries. I’ve learned this the hard way while trying to fix something at night—definitely not my brightest idea!
- Ask for help: Don’t hesitate to ask a friend or family member for assistance or advice. Sometimes, two heads are better than one! I’ve had many successful projects thanks to a buddy who had a little more experience.
Budget & Time Signals
When budgeting for your DIY automotive projects, consider the following:
- Cost of tools: A basic toolkit can range from $50 to $200, depending on quality and quantity. If you're starting from scratch, invest in a solid set; it’ll pay off in the long run. Don’t skimp; cheap tools can lead to frustration and even accidents.
- Project complexity: Simple tasks like oil changes can take an hour or two, while more involved jobs, like brake replacements, might take all day. Be realistic about how much time you’ll need. I often overestimate my time, so I try to set aside more than I think I’ll need.
- Parts and materials: Always check the prices of any parts you need. Websites and local auto parts stores often have sales, so keep an eye out for deals. Sometimes, you can find better prices online, but factor in shipping time.
- Unexpected costs: Be prepared for unexpected issues that might arise, such as needing to replace a bolt or gasket. It’s wise to have a little extra budgeted for surprises. I’ve learned to always budget an extra 10-20% for unforeseen costs.
- Phasing projects: If you have a more extensive project in mind, consider breaking it into phases. This way, you can spread the cost and time over several weekends. I often do this for larger repairs, which helps manage my time and budget effectively.
When to Call a Pro
While DIY is rewarding, there are times when it’s best to hand the reins over to a professional:
- Complex repairs: If you’re dealing with engine problems or transmission issues, it’s time to call a pro. These repairs require specialized knowledge and tools. I once tried to fix a timing belt on my own, and let’s just say I learned my lesson the hard way.
- Safety concerns: If you’re unsure about your ability to perform a task safely, don’t hesitate to seek help. Your safety is paramount. I’ve had moments where I realized I didn’t have the right equipment, and it’s best to step back.
- Time constraints: If you’re short on time and the repair is urgent (like brakes or tires), a professional can often get it done faster. I’ve had to call a mechanic when my car wouldn’t start, and it saved me a lot of hassle.
- Warranty issues: If your vehicle is under warranty, certain repairs should be handled by a certified mechanic to avoid voiding the warranty. Always check before you start tinkering.
- Lack of confidence: If you’re feeling overwhelmed or unsure about a specific task, it’s okay to ask for help. Sometimes, it’s better to learn from the pros. I’ve called in friends who are mechanics for advice, and it’s always worth it.
Conclusion
Congratulations on taking the first steps into the world of DIY automotive projects! Remember that every expert was once a beginner, and with patience and practice, you’ll build your skills and confidence over time. Start small, keep safety at the forefront, and don’t hesitate to reach out for help when you need it.
As a simple next step, why not gather your basic tools and check your vehicle’s oil and air filter this weekend? It’s a great way to get your feet wet and will help you feel more comfortable working on your car. Happy DIYing!