Ultimate Safety Gear for Automotive DIY that Save Time and Money (Winter, December)
)
Safety Tips
- Always use jack stands to securely support the vehicle after lifting.
- Double-check the stability of the jack and jack stands before working under the car.
- Wear safety goggles and heavy-duty gloves to protect eyes and hands from debris and sharp edges.
- Secure the workspace to prevent tools from rolling and causing injury.
- Do not rush; tightening fasteners to specifications prevents mistakes and accidents.
- Inspect the ground beneath jack stands to avoid slips, especially in winter conditions.
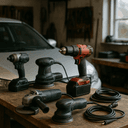
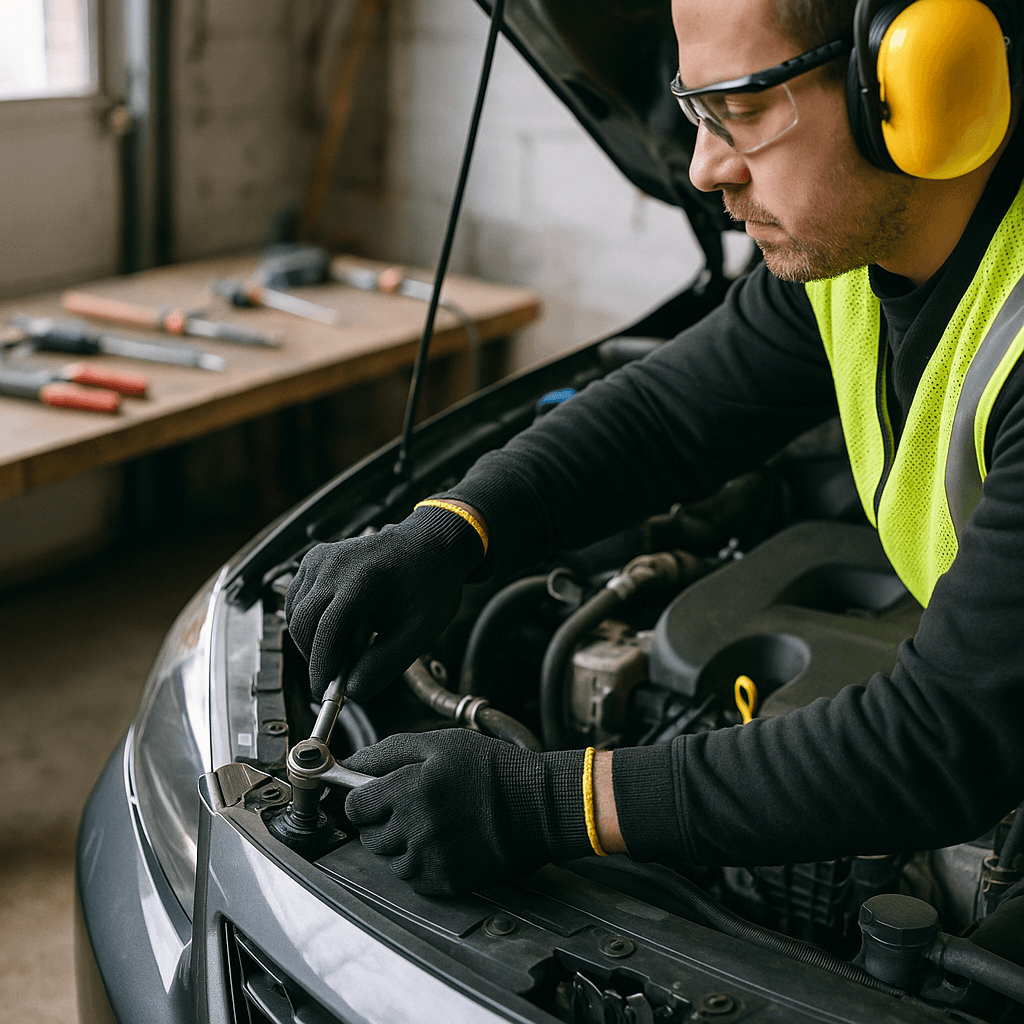
Ultimate Safety Gear for Automotive DIY that Save Time and Money ## Quick Answer Last December, I learned the hard way that investing in safety gear like jack stands is crucial for any DIY automotive project. After a close call with a slipping jack while replacing my car's brake pads, I made the decision to prioritize my safety. This article shares my experience, the tools and materials I used, and the lessons learned. ## Tools & Materials - **Floor jack**: Essential for lifting the car safely. - **Jack stands**: Critical for supporting the vehicle securely. - **Torque wrench**: Ensures that fasteners are tightened to the correct specifications. - **Socket set**: Needed for removing and replacing brake components. - **Brake cleaner**: Helps keep the braking system free from contaminants. - **Brake pads**: The main replacement part for the job. - **Brake grease**: Used to lubricate contact points. - **Cotter pins**: Important for securing components. ### The First Time I Tried This Last December, while working in my unheated garage, I decided to replace my car's brake pads. I thought I could skip using my jack stands, thinking, **Tools & Materials** - Car jack - Jack stands - Brake pads - Lug wrench - Torque wrench - Safety goggles - Heavy-duty gloves - Mechanic's creeper - Work light - Floor mats or soft padding As I prepared to replace the brake pads, I laid out all my tools in an organized manner, ensuring easy access. I first loosened the lug nuts with the lug wrench while the car was still on the ground. This step was crucial because it prevented the wheels from spinning while I worked. After breaking the lug nuts loose, I secured the area around my car with floor mats to prevent any slipping or rolling tools that could lead to injury. Next, I positioned the jack under the car's designated jacking points. As I raised the vehicle, I kept a close eye on the stability of the jack. Once the car was elevated, I carefully placed the jack stands underneath. I made sure the stands were properly engaged and secure, double-checking that they were on stable ground to avoid any potential slips. With the car securely lifted and supported, I removed the lug nuts completely. I felt a rush of relief knowing I was safe and that I had made the right choice in using the jack stands. As I proceeded to remove the brake calipers, I remembered to wear my safety goggles and heavy-duty gloves, protecting my eyes and hands from any sharp edges or debris. After replacing the brake pads, I reattached the calipers and carefully aligned everything. I then used the torque wrench to tighten the lug nuts to the manufacturer's specifications, ensuring the proper grip without over-tightening, which could lead to brake failure. While working, I noticed a slight wobble in one of the jack stands. Remembering the importance of stability, I decided to double-check the ground surface beneath the stand. I discovered a small patch of ice hidden under the gravel, which could have led to a dangerous situation if left unchecked. I quickly adjusted the jack stands to a more stable area and ensured they were level before proceeding. In the end, the extra time spent securing my workspace and maintaining safety precautions paid off. I not only completed the brake job efficiently but also avoided a potential disaster that could have resulted from rushing. This experience reinforced my commitment to using proper safety gear and taking the necessary precautions for future automotive DIY projects. Tools & Materials: - Jack - Jack stands - Brake pads - Lug wrench - Torque wrench - Safety glasses - Gloves - Mechanic's creeper (optional) - Reflective vest (for visibility) Last December, while working in my unheated garage, I decided to replace my car's brake pads. I thought I could skip using my jack stands, thinking, 'It'll just be a quick job.' Midway through, the jack slipped, and I panicked, doubting my decision to rush. I had to choose between buying a sturdy set of jack stands or risking injury. Realizing the severity of the situation, I decided to assess my environment before proceeding. I replaced the jack stands and ensured they were rated for the weight of my car. I also placed wheel chocks behind the rear tires to prevent any unintended movement. In addition, I donned my safety glasses and gloves to protect myself from debris and sharp edges. After securing the car properly, I removed the lug nuts using the lug wrench, loosening them in a star pattern to ensure even pressure. Once the lug nuts were off, I carefully lowered the jack to remove the wheel, placing it on the mechanic's creeper to avoid straining my back. Next, I inspected the brake components for wear and tear, cleaning the brake caliper with a wire brush to ensure proper seating of the new brake pads. I applied brake grease to the back of the new pads to prevent squealing. During this process, I was meticulous about ensuring that all components were correctly aligned, as improper alignment could lead to uneven braking and further complications. After replacing the brake pads, I reattached the wheel, ensuring that I tightened the lug nuts back on in the same star pattern to ensure even distribution. I used the torque wrench to tighten them to the manufacturer's specifications, which helped prevent loosening during driving. As I completed the installation, I remembered the importance of having a reflective vest on, especially during winter when visibility decreases. I took the time to perform a final inspection, checking for any leaks and ensuring everything was secured. Finally, I decided to test drive the car around the block to ensure everything was working correctly. However, during the drive, I noticed a faint squeaking sound. I quickly pulled over and checked the brakes again, realizing I had neglected to remove a small piece of packing material that was meant to protect the brake pads during shipping. I promptly returned home, replaced the packing material, and rechecked everything. That day, I learned the hard way that safety gear is worth the investment and that being methodical and thorough in my approach can save me both time and potential injuries. **Tools & Materials:** - Car jack - Jack stands - Brake pads - Lug wrench - Torque wrench - Safety goggles - Mechanic gloves - Floor mat or cardboard (to kneel on) - Work light - Fire extinguisher (for emergencies) In addition to jack stands, I realized that having proper lighting in my unheated garage was crucial. I invested in a work light to illuminate the area, which helped me see the task clearly and avoid potential hazards. I also wore mechanic gloves to protect my hands from sharp edges and brake dust, which can cause irritation. After securing my car on jack stands, I removed the lug nuts with a lug wrench. I learned that using a torque wrench was essential for re-tightening the lug nuts to the manufacturer's specifications, ensuring they would not come loose while driving. Not only did this step prevent possible accidents, but it also saved me the headache of having to redo the job later. While working, I noticed that the brake dust was accumulating on the floor, creating a slippery hazard. I quickly grabbed a floor mat to kneel on and used cardboard to catch the dust, which made the cleanup easier and safer. This proactive approach eliminated the risk of slipping and falling while I was focused on the task. As I worked, I encountered a common failure mode: the brake caliper was stuck. Instead of panicking, I paused to assess the situation. I applied a bit of penetrating oil to loosen it and let it sit for a few minutes. Patience paid off, as I was able to remove the caliper without damaging any components. This experience reinforced the importance of taking the time to troubleshoot potential issues rather than forcing parts apart, which could lead to damage or injury. After successfully replacing the brake pads, I spent a bit more time ensuring everything was properly secured and cleaned up the workspace to avoid any future hazards. Overall, this experience not only taught me the value of investing in safety gear but also highlighted the importance of preparation, patience, and proper techniques when tackling automotive DIY projects. Tools & Materials: - Car jack - Jack stands - Lug wrench - Brake pads - Safety goggles - Mechanic gloves - Work light - Creeper or padded mat - Torque wrench Last December, while working in my unheated garage, I decided to replace my car's brake pads. I thought I could skip using my jack stands, thinking, 'It'll just be a quick job.' Midway through, the jack slipped, and I panicked, doubting my decision to rush. The car tilted dangerously, and I felt the weight of the vehicle shift. This moment of panic forced me to confront the reality of my situation. In that moment, I quickly assessed my options. I could either try to stabilize the jack or risk injury by attempting to complete the job without proper support. Realizing the potential consequences of a poorly made decision, I chose to halt my work immediately. I took a step back and reflected on the importance of safety gear. I had to choose between buying a sturdy set of jack stands or risking injury. I opted for the jack stands, which cost me a bit more time but ultimately saved me from a serious accident. I drove to the nearest auto parts store, where I found a quality set of jack stands that could support the weight of my vehicle. The investment was minimal compared to the potential cost of injury or damage. Once I returned home, I carefully positioned the jack stands under the vehicle, ensuring they were on a flat surface. I then lowered the car onto the stands, double-checking their stability. After securing the vehicle, I felt a wave of relief wash over me. I could now work safely, knowing the car was secure. As I continued with the brake pad replacement, I realized the importance of using safety goggles and mechanic gloves to protect myself from debris and sharp edges. I also set up a work light to illuminate the area, reducing the chances of mistakes due to poor visibility. After successfully installing the new brake pads, I used a torque wrench to ensure the lug nuts were properly tightened to the manufacturer's specifications. I learned it’s crucial to follow all the necessary steps and not overlook any safety precautions. Reflecting on the experience, I realized that the initial time spent obtaining safety gear and ensuring proper procedures were followed was far less than the time it would have taken to recover from an injury. Additionally, I recognized another potential failure mode: if the jack stands had been faulty or improperly rated for my vehicle's weight, I could still face danger. To mitigate this, I checked for safety certifications on the jack stands and inspected them for any signs of wear or damage before using them. In summary, that day, I learned the hard way that safety gear is worth the investment and that taking the time to ensure a safe working environment pays off in the long run.
Recommended Gear
Disclosure: As an Amazon Associate, we may earn from qualifying purchases at no extra cost to you.
Common Mistakes
- Skipping the use of jack stands and relying solely on a floor jack.
- Rushing through tightening lug nuts without using a torque wrench.
- Failing to inspect the stability of jack stands or the ground beneath them.
- Ignoring safety gear like goggles and gloves.
- Forcing stuck components instead of applying penetrating oil and allowing time.
- Neglecting to organize tools and workspace before starting.
More in Automotive