Time-Saving Automotive Gear for Home Organization for Safer Projects (Winter, December, Christmas)
)
Safety Tips
- Store automotive fluids in a cool, dry place and ensure containers are sealed and upright.
- Keep sharp tools in designated safe spots to prevent injuries.
- Clean spills promptly to avoid slips and falls.
- Label hazardous materials clearly.
- Prioritize safety over convenience when organizing.
Before You Start / What to Know Up Front
If you’ve ever found yourself in a cluttered garage, surrounded by tools, automotive supplies, and who-knows-what-else, you’re definitely not alone. I used to dread stepping into my garage because it felt more like a junkyard than a space for creativity and projects. The chaos not only made it hard to find what I needed but also posed significant safety hazards. Organizing your automotive gear can save you time, reduce stress, and make your workspace much safer for all those cool DIY projects you want to tackle. This guide is perfect for DIYers looking to optimize their home, garage, or workspace layout—especially as we dive into the winter months when our indoor projects ramp up.
Expect that this journey might take some time and effort, but it’s well worth it. We'll work together to create a streamlined environment where everything has its place. By the end, you’ll have a workspace that not only looks great but also functions efficiently.
Method Overview
Our approach to organizing automotive gear revolves around three core principles: decluttering, categorizing, and efficiently storing. First, we’ll clear out everything you’ve got, allowing you to see what you’re working with. Then, we’ll categorize your items—tools, fluids, spare parts, etc.—to make it easier to find what you need when you need it. Finally, we’ll set up efficient storage solutions that can include shelving, bins, and hooks.
This method works well for DIYers who have a broad range of automotive gear and want to create a safer workspace. However, if you have very limited space or a very small collection of items, you might want to consider a minimalist approach instead. The steps I’ll cover can be quite flexible and can fit various types of spaces, from compact garages to larger workshops.
Deep Step Detail
Let’s dive into the nitty-gritty of each step. It’s important to follow these steps in order so that you don't end up just moving clutter around.
Step 1: Clear the Space
Begin by emptying your garage or workspace. I know, it sounds daunting, but trust me when I say that this is the most crucial step. Take everything out, even if it means making a temporary mess. This will give you a clean slate to work with, allowing you to see exactly what you have. As you do this, keep an eye out for any items that might be damaged or no longer useful. This will also help you understand the space you’re working with. Most DIYers I see underestimate the value of this step, but it’s key to knowing what you’re really dealing with.
Step 2: Sort and Categorize
Once you’ve cleared everything out, it’s time to categorize your items. Here’s a simple method to follow:
- Tools: Wrenches, sockets, screwdrivers, etc.
- Automotive Fluids: Oil, coolant, windshield washer fluid, etc.
- Parts and Accessories: Filters, belts, spare bulbs, etc.
- Cleaning Supplies: Rags, brushes, cleaning solutions, etc.
- Miscellaneous: Anything that doesn’t fit in the previous categories.
As you sort, consider creating a “donate” pile for items that are still in good condition but that you no longer need. The first time I did this, I was surprised by how much I was able to give away. It felt great to declutter and help someone else in the process.
Step 3: Clean the Space
Before you start putting things back, take the opportunity to clean the space thoroughly. Sweep out any debris, dust off surfaces, and clean any stains. If you have a concrete floor, consider using a degreaser to tackle any oil spills. I once made the mistake of skipping this step, only to find out later that grime had accumulated under my new shelving units, making it a pain to clean later. Trust me, a clean workspace is not just aesthetically pleasing; it can also prevent slips and falls.
Step 4: Choose Your Storage Solutions
Now it’s time to think about how you want to store everything. Here are some options:
- Shelving Units: Great for tools and larger items. Look for sturdy, adjustable shelves that can hold the weight of your gear without buckling.
- Plastic Bins: Perfect for smaller items and can be labeled for easy identification. I prefer clear bins so I can see what’s inside at a glance.
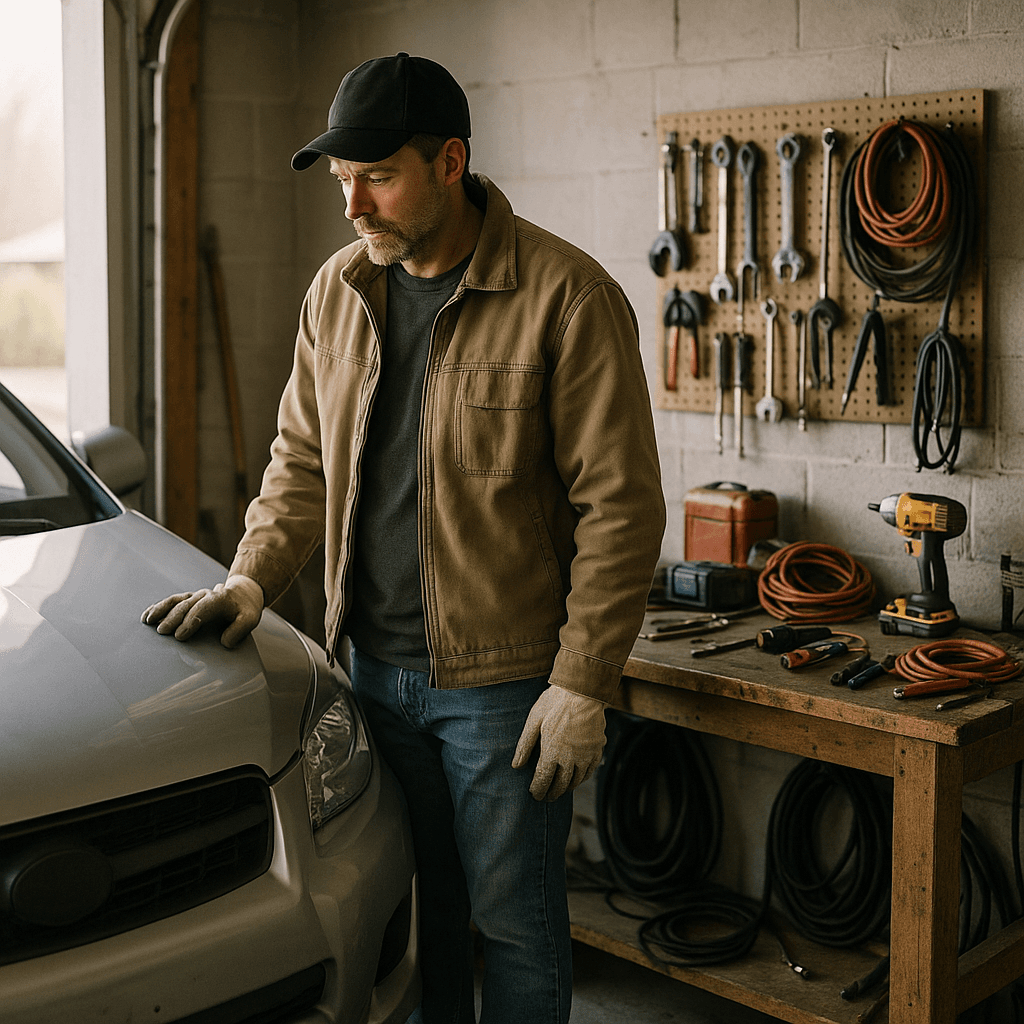
- Pegboards: Ideal for hanging tools and keeping them visible and accessible. I’ve found this really speeds up my workflow since I can grab what I need without rummaging through drawers.
- Wall-Mounted Racks: These can save floor space and hold items like hoses or wrenches. A simple wall-mounted tool holder can make a big difference in keeping things off the ground.
When I first set up my storage, I underestimated how important it was to have a mix of different storage solutions. Don’t make that mistake; variety will keep your space organized.
Step 5: Organize and Label
As you put everything back, think about how often you use each item. Store frequently used tools at eye level, while less-used items can go higher or lower. Don’t forget to label your bins and shelves! This will save you a ton of time when you’re in a rush to find something. I use a simple label maker for this, and it’s been a game changer. It’s amazing how much smoother everything goes when you can quickly grab what you need.
Step 6: Regular Maintenance
Once you’ve organized everything, set a schedule for regular maintenance. Even if it’s just 10-15 minutes every month, this can help you keep your space tidy and prevent clutter from building up again. When I started doing this, I found that I spent less time searching for tools and more time actually using them. A little upkeep goes a long way in maintaining your organized space.
Troubleshooting & Fix-ups
As with any DIY project, things don’t always go as planned. Here are a few common issues you might face and how to deal with them:
- Too Much Stuff: If you find that you have more items than space, take a hard look at what you really need. It’s okay to let go of items that you haven’t used in over a year. Don’t be afraid to make tough decisions; your space will thank you.
- Storage Solutions Not Working: If you find that your storage isn’t functioning as planned, don’t hesitate to rearrange or swap out solutions. Sometimes, what works for one person doesn’t work for another. I’ve had to change my layout a few times until I found what worked best for me.
- Finding a Place for Odd-Shaped Items: If you have items that don’t fit neatly into bins or on shelves, consider using clear storage drawers or even repurposing old containers. I’ve used old toolboxes to store odd bits and pieces, and they look great too!
- Safety Hazards: If you notice any sharp tools or hazardous materials lying around, make it a priority to store them safely. This includes putting away tools in their designated spots and ensuring that any automotive fluids are sealed and stored upright. Always prioritize safety over convenience.
Common Mistakes & How to Avoid Them
In my years of DIYing, I’ve seen people make some common mistakes that can hinder their organization efforts:
- Not Taking Time to Sort: Rushing through the sorting process can lead to you missing out on items that should be thrown away or donated. Take your time! It’s worth it in the long run.
- Ignoring Vertical Space: Many DIYers forget about the walls and ceiling. Use wall space for storage to free up floor space. I’ve installed shelves and hooks on my walls, and the difference is night and day.
- Overlooking Safety: Items like automotive fluids should be stored in a cool, dry place to avoid spills or deterioration. Make sure to follow safety guidelines for storage, including labeling any hazardous materials clearly.
- Skipping Labels: Not labeling bins and shelves can lead to frustration later. Even if you think you’ll remember where everything is, trust me, you won’t. Labels save time and headaches!
- Not Revisiting the Setup: Just because you’ve organized once doesn’t mean it stays that way. Regularly revisit your setup and adjust as needed. I find that seasonal check-ins help keep everything in its place.
Pro Tips & Lessons Learned
Here are a few tricks that I’ve picked up over the years that can help you save time and frustration:
- Use Clear Bins: This allows you to quickly see what’s inside without having to open every container. It can save a lot of time.
- Color Code Your Labels: Assign different colors to different categories. For example, red for tools, blue for fluids, etc. It speeds up the process of finding what you need.
- Invest in Quality Tools: It’s better to have a few high-quality tools than a lot of cheap ones that break easily. When I first started out, I bought a lot of inexpensive tools that ended up costing me more in the long run. Quality pays off!
- Consider a Mobile Workbench: If you have the space, a mobile workbench can be a great addition. It gives you a dedicated workspace that can be moved as needed. I use mine for everything from car repairs to woodworking projects.
- Utilize the Ceiling: If you’re short on floor space, consider hanging items from the ceiling. This can be great for bikes, ladders, or even storage bins. It’s a smart way to keep things off the ground and accessible.
Budget & Time Signals
While organizing your automotive gear can be a huge undertaking, you can do it on a budget. Depending on how much you need to buy, here’s a rough estimate:
- Basic supplies (bins, labels, shelving): $100 - $300
- Quality tools: $50 - $200 (depending on what you need)
- Cleaning supplies: $20 - $50
In terms of time, expect to spend anywhere from 4 to 10 hours total, depending on how much stuff you have and how long you take to sort and categorize. You can also phase this project; for instance, tackle one category at a time over a weekend.
When to Call a Pro
While most of us can handle organizing our own spaces, there are times when it’s best to call in a professional:
- Electrical Issues: If you’re dealing with any electrical tools or wiring, it’s best to leave that to the pros. Safety first!
- Structural Concerns: If you’re considering major renovations or changes to your garage structure, consult a professional to ensure everything meets safety standards.
- Hazardous Materials: If you’re unsure how to safely store or dispose of automotive fluids, contact a local hazardous waste disposal facility. Don’t take chances with your health or the environment.
Conclusion
Organizing your automotive gear isn’t just about tidiness; it’s about creating a safer, more efficient workspace that allows you to dive into your DIY projects with ease. By following these steps, you’ll not only improve your space but also enhance your overall DIY experience. So, gather your supplies, roll up your sleeves, and start tackling that clutter today! Remember, the first step is often the hardest, but once you get going, you'll be amazed at how much you can accomplish. Your future self will thank you!
Recommended Gear
Disclosure: As an Amazon Associate, we may earn from qualifying purchases at no extra cost to you.
Common Mistakes
- Rushing through sorting and missing items to throw away or donate.
- Ignoring vertical space and not utilizing walls for storage.
- Overlooking safety by improperly storing fluids or tools.
- Skipping labeling which leads to frustration and wasted time.
- Failing to revisit and maintain the organization regularly.
More in Organization

