Must-Have Safety Gear for DIY Business & Side Hustles Your Wallet Will Thank You For (Winter, December, Christmas)
)
Tools Needed
Materials Needed
Safety Tips
- Never skip safety gear, even for small jobs.
- Read and follow manufacturer instructions for all tools.
- Keep your workspace organized to avoid trips and falls.
- Use anti-fog spray or anti-fog safety glasses to prevent fogging.
- Ensure dust masks and respirators fit properly for comfort and effectiveness.
- Try on gloves before purchasing to avoid slipping or looseness.
- Consider gel insoles for comfort in steel-toed boots.
- Take regular breaks to prevent fatigue-related accidents.
Must-Have Safety Gear for DIY Business & Side Hustles Your Wallet Will Thank You For
As the winter season rolls around, many DIY enthusiasts are eager to turn their skills into a side hustle. Whether you’re crafting holiday decorations, building furniture, or tackling home repairs, one thing is clear: safety should always be your top priority. I learned this the hard way during a chilly December when I attempted a project without proper gear and ended up with a nasty cut on my finger. Trust me, investing in safety gear is not an expense; it’s an investment in your health and your business.
This article is for DIYers who are looking to make a profit from their skills while ensuring they stay safe and sound. If you’re just starting out or if you’ve been in the game for a while but want to refresh your safety knowledge, grab a cup of hot cocoa and let’s dive in!
Before You Start / What to Know Up Front
Before you jump into any DIY project, it’s important to set the right expectations. I remember my first winter crafting project; I thought I could whip up some amazing wooden toys in a weekend. Spoiler alert: it took much longer than expected! Understanding your limits and the time each project will take is crucial, especially in the hustle and bustle of the holiday season.
You’ll also need to be aware of local business licensing, taxes, and insurance requirements. It might sound tedious, but getting this sorted will save you a world of headache down the line. Think of it as the foundation of your DIY business. If it’s shaky, everything else risks collapsing.
Method Overview
In this guide, we’ll take a structured approach to safety gear, emphasizing why each item is essential, what to look for, and when it might be overkill. The method we’ll follow is straightforward: assess your work environment, identify potential hazards, and equip yourself accordingly. This method works because it’s proactive rather than reactive. You’re setting yourself up for success before you even begin your projects.
However, if you’re working in a space that’s not yours (like a rented workshop) or if you’ll be dealing with heavy machinery, it’s best to consult with a professional or experienced DIYer first. Sometimes, the risks outweigh the benefits, and that’s perfectly okay.
Deep Step Detail
Let’s break this down into specific steps for gathering your safety gear. I’ll also share my personal experiences with each item.
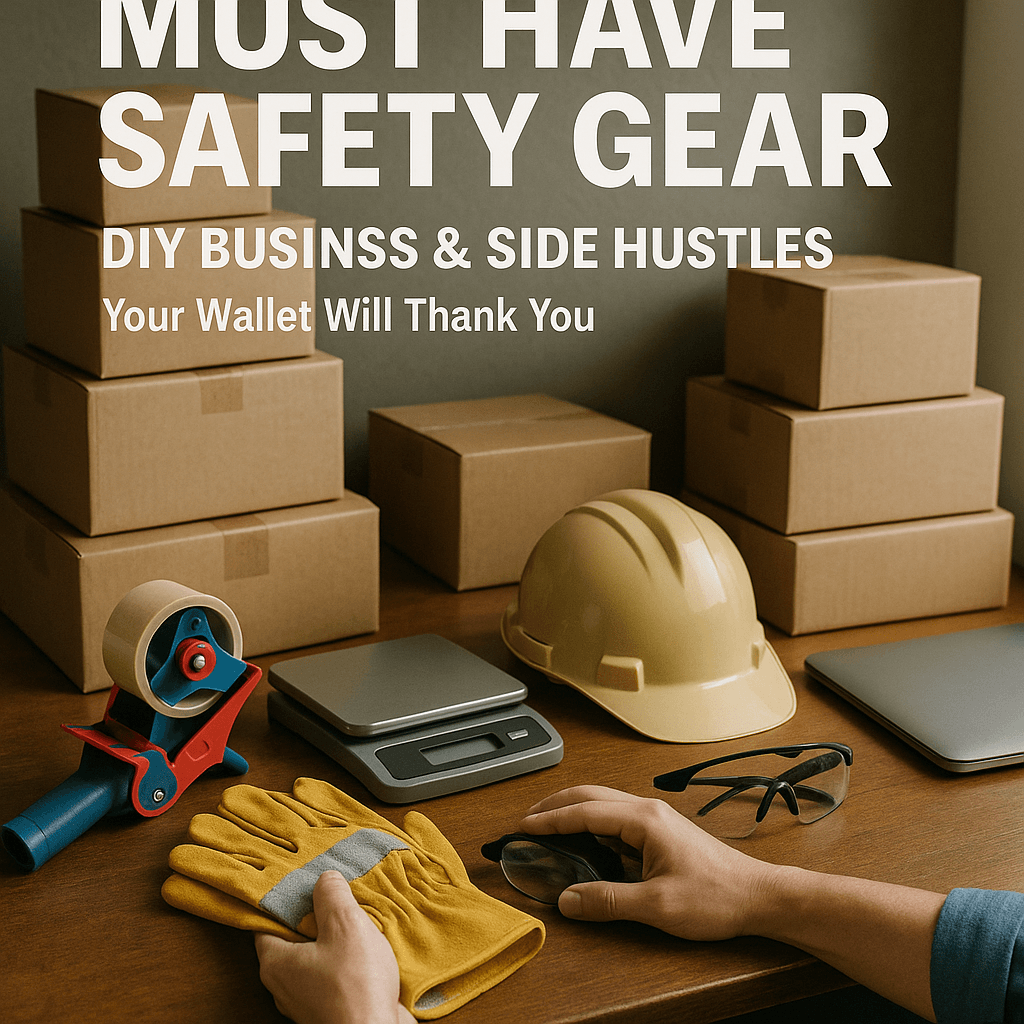
- Safety Glasses: Whether you’re cutting wood or mixing chemicals, protecting your eyes is crucial. I once had a small piece of wood fly into my eye while cutting—trust me, it’s not a good time. Look for ANSI-rated safety glasses that fit snugly and comfortably. Keep an extra pair in your toolbox; you never know when you’ll need them.
- Dust Masks or Respirators: When sanding or working with materials that produce dust, a simple dust mask won’t cut it. I learned the hard way that a respirator, especially one rated for fine particles (like N95 or P100), can make a huge difference. You’ll be surprised how much cleaner your lungs will feel after a long day of sanding wood or cutting drywall.
- Ear Protection: If you’re using loud tools, like saws or drills, invest in quality earplugs or earmuffs. I used to think I could tough it out, but after a few hours, I regretted not wearing ear protection. Look for options that provide a good noise reduction rating (NRR). Trust me, your ears will thank you years down the line.
- Work Gloves: The right pair of gloves can protect your hands from cuts, splinters, and chemicals. I’ve tried many brands, but I find that those that are cut-resistant and have a good grip are the best. Make sure they fit well; loose gloves can lead to accidents. I’ve learned this the hard way while handling sharp tools.
- Steel-Toed Boots: If you’re working with heavy materials, steel-toed boots are a must. I learned this the hard way when a heavy box slipped out of my hands and landed on my foot. The boots might feel bulky, but they can save your toes! Look for options with good grip and comfort for long hours on your feet.
- Knee Pads: If your projects require a lot of kneeling, invest in a good pair of knee pads. I used to think I could just tough it out, but after a few hours of kneeling on hard surfaces, my knees were sore for days. Look for ones with good cushioning and a non-slip surface. You’ll thank yourself when you’re not limping around after a long day.
Troubleshooting & Fix-ups
Even with the best safety gear, accidents can happen. Here are some common problems and how to handle them:
- Foggy Safety Glasses: If your glasses fog up, try anti-fog spray or look for anti-fog safety glasses. I found that some brands tend to fog less than others, so it’s worth testing a few. Also, consider using a mask that fits well, as this can sometimes help.
- Dust Mask Discomfort: If your mask feels uncomfortable, ensure it’s fitted properly. If it still bothers you, consider getting a respirator that’s designed for longer wear. It's a game changer! I switched to a more ergonomic model, and it made a world of difference during long sanding sessions.
- Slipping Gloves: If your gloves slip or feel too loose, they can be more harmful than helpful. Always try them on before purchasing, and consider using a size smaller if they feel too baggy. I’ve had my fair share of near-misses because of this mistake.
- Foot Pain from Steel-Toed Boots: If your boots are uncomfortable, it might be worth investing in some gel insoles. I did this, and it made a world of difference. Your feet will thank you—after all, they carry you through every project!
Common Mistakes & How to Avoid Them
As a seasoned DIYer, I’ve seen my fair share of mistakes. Here are some of the most common pitfalls and how to sidestep them:
- Skipping Safety Gear: Many DIYers think they can skip safety gear for small jobs. I did this once, and it ended with a trip to the ER. Always wear your gear, no matter how minor the task seems. Make it a habit, not a choice.
- Ignoring Manufacturer Instructions: Every tool comes with its own safety instructions. I used to think I knew better, but I learned the hard way that every tool has quirks. Read the manual—it can save you a lot of trouble. This is especially true for power tools, which can be deceptively complex.
- Overlooking the Work Environment: Not assessing your workspace can lead to accidents. I once tripped over a power cord because I didn’t take the time to organize my area. Before starting, do a quick safety sweep of your workspace. A cluttered space can lead to a cluttered mind and mistakes.
- Neglecting to Maintain Tools: Well-maintained tools are safer to use. I’ve had tools malfunction simply because I didn’t take the time to clean them or check for wear and tear. Make it a habit to inspect your gear regularly, and you’ll avoid many headaches.
- Not Taking Breaks: It’s easy to get caught up in a project and forget to take breaks. I used to push through, but I found that fatigue can lead to accidents. Set a timer to remind yourself to step away for a few minutes. Your work will be better for it!
Pro Tips & Lessons Learned
Here are some smaller tricks I’ve picked up over the years:
- Invest in a First Aid Kit: Accidents happen, so it’s best to be prepared. I always keep a well-stocked first aid kit in my workspace. You can find kits specifically designed for DIY jobs. Make sure it’s easily accessible, too.
- Use a Safety Checklist: Before starting a project, I recommend creating a safety checklist. It ensures you don’t forget any crucial gear. Keeping a list on your phone can be handy—you can even check it off as you go!
- Practice Good Posture: Maintaining a good posture while working can prevent long-term injuries. I’ve learned this the hard way after years of bad habits. Pay attention to how you position your body during projects. Consider investing in ergonomic tools when possible.
- Stay Hydrated: It’s easy to forget to drink water when you’re focused on a project. Staying hydrated will keep your energy levels up and your mind sharp. I keep a water bottle nearby to remind myself.
- Join a DIY Community: Surround yourself with like-minded individuals. I joined a local DIY group, and it’s been a fantastic resource for tips and support. You can learn from others’ experiences and mishaps, which can save you from making similar mistakes.
Budget & Time Signals
When it comes to budgeting for safety gear, here’s a rough idea of what you might expect:
- Safety Glasses: $10-$50, depending on the brand and features.
- Dust Masks/Respirators: $15-$50 for a quality respirator.
- Ear Protection: $10-$30 for comfortable options.
- Work Gloves: $10-$40 for durable pairs.
- Steel-Toed Boots: $50-$200, depending on the brand and features.
- Knee Pads: $15-$60 based on comfort and style.
You can phase these purchases based on your immediate needs. For instance, if you’re just getting started, focus on the most essential items first, like safety glasses and gloves, and build your gear collection over time.
When to Call a Pro
There are times when it’s best to step back and call in a professional. If you find yourself dealing with:
- Complex Electrical Work: Unless you’re experienced, don’t attempt large electrical projects. The risks are significant, and it’s best left to the pros.
- Heavy Lifting: If a project involves heavy lifting that exceeds your capabilities, don’t risk injury. Call a professional mover or contractor.
- Structural Changes: If you’re considering making structural changes to your home, it’s essential to consult with a structural engineer. The integrity of your home is at stake, and you don’t want to compromise that.
- Chemical Exposure: If your project involves hazardous chemicals, it’s worth consulting with a professional to ensure you’re handling them safely. Always err on the side of caution here.
Conclusion
As we wrap up, remember that safety gear is a crucial part of your DIY toolkit. It protects you and allows you to focus on being creative and productive without worrying about accidents. I encourage you to take a moment today to assess your safety gear. If you’re missing something, make a plan to pick it up soon. Remember, safety isn’t just a checklist; it’s a mindset that will serve you well throughout your DIY journey. Happy DIYing this winter season!
Recommended Gear
Disclosure: As an Amazon Associate, we may earn from qualifying purchases at no extra cost to you.
Common Mistakes
- Skipping safety gear for minor tasks.
- Ignoring tool manufacturer safety instructions.
- Failing to assess and organize the work environment.
- Neglecting tool and gear maintenance.
- Not taking breaks leading to fatigue.
- Wearing ill-fitting gloves that slip.
- Using uncomfortable boots without proper insoles.
More in Side Hustles