How to Garage Upgrades for Automotive DIY with These Amazon Deals (Winter, December)
)
Tools Needed
Materials Needed
Safety Tips
- Always turn off electrical power before working on wiring to avoid shocks.
- Wear gloves and safety goggles when handling tools and materials.
- Ensure heaters are installed away from flammable materials to prevent fire hazards.
- Read and follow manufacturer instructions carefully for all installations.
- Avoid rushing to reduce risk of accidents or improper installations.
How to Garage Upgrades for Automotive DIY with These Amazon Deals (Winter, December)
As the winter months roll in, many of us start thinking about upgrading our garages to make them more functional and enjoyable for automotive DIY projects. I remember the first winter I spent hunched over my car, trying to work while shivering in the cold. It became clear that having the right setup not only made my projects easier but also a lot more enjoyable. In this guide, I’ll walk you through some fantastic upgrades you can make to your garage, while also highlighting great deals you can find on Amazon this December.
This guide is designed for intermediate automotive DIYers who already have some basic tools and jack stands. If you've tackled oil changes, swapped out a battery, or worked on brake jobs, you’re in the right place. We’ll dive deep into the steps, tools, and tricks you need to create a workspace that not only helps you complete your projects efficiently but also keeps you safe.
Before You Start / What to Know Up Front
Before diving into any upgrades, it's crucial to set realistic expectations. Upgrading your garage isn't just about buying new tools or organizing your space; it's about creating a functional environment that enhances your DIY experience. The first upgrade I made was installing a heater, which transformed my freezing garage into a cozy workshop. It’s amazing how just a little warmth can change your motivation and productivity.
You should also consider your budget. While some upgrades can be done affordably, others may require more investment. For instance, investing in high-quality tools will save you money in the long run, as they often last longer and perform better than cheaper alternatives. Remember, it’s easier to spend a little more now than to keep replacing broken tools later.
Method Overview
The approach here emphasizes gradual upgrades. This method allows you to spread out costs while continually improving your workspace. We’ll focus on essential upgrades like lighting, storage solutions, tool organization, and climate control. Most DIYers I see tend to tackle one upgrade per month, especially if the budget is tight, which is a smart strategy.
However, keep in mind that this method isn’t one-size-fits-all. If your garage has immediate issues, like a leaky roof or broken windows, those should take precedence over upgrades. Always prioritize your safety and functionality first.
Deep Step Detail
Let’s break down the steps you can take to upgrade your garage. Each section will include the tools you'll need, specific settings if applicable, and options to consider.
1. Upgrade Your Lighting
One of the most significant changes you can make is upgrading your lighting. Poor lighting can lead to mistakes and accidents. I remember working late into the evening with just a single bulb overhead, squinting at my work. Installing LED lights not only brightened the space but also saved on energy costs. Here's how to do it:
- Tools Needed: Screwdriver, wire connectors, ladder.
- Steps:
- Turn off the power to your garage at the circuit breaker. This is a crucial safety step—never work on electrical without cutting power.
- Remove old fixtures and replace them with LED shop lights. These are bright, energy-efficient, and last a long time.
- Secure the new fixtures in place and connect the wiring, following the manufacturer's instructions.
- Turn the power back on and test your new lights.
2. Enhance Climate Control
Winter in the garage can be brutal. Adding a space heater or installing insulation can make a huge difference. I finally invested in a propane heater, and it completely changed my garage experience. Here’s how to approach this:
- Tools Needed: Heater, extension cord, insulation materials (if needed).
- Steps:
- Assess your garage for insulation needs. If your garage is poorly insulated, consider adding foam panels to the walls and ceiling.
- Install the heater according to the manufacturer's instructions, ensuring it's safe and away from flammable materials.
- For added efficiency, seal any drafts around windows and doors with weather stripping.
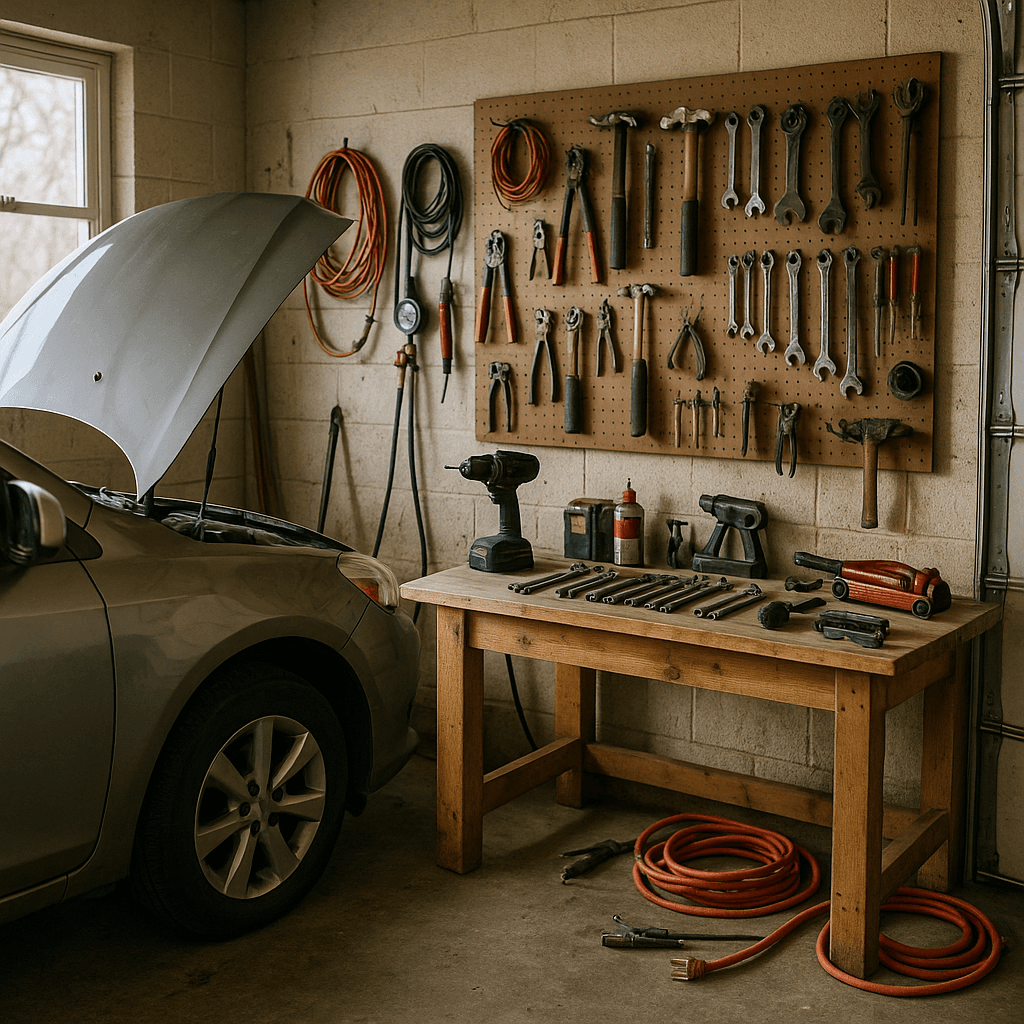
3. Organize Tools and Equipment
A cluttered garage is not only frustrating but can also be dangerous. Creating a dedicated space for tools will save you time and help prevent accidents. I’ve seen too many DIYers leave tools scattered around, leading to trips and falls. Here’s how to organize:
- Tools Needed: Tool organizers, pegboards, shelves.
- Steps:
- Invest in a pegboard system for hanging tools. This keeps them visible and accessible without taking up valuable workspace.
- Use labeled bins and drawers to store smaller items like screws, bolts, and nuts. It’s amazing how much time you can save by knowing exactly where everything is.
- Create a workbench area where you can keep frequently used tools at arm’s reach. A clutter-free bench can make all the difference in your workflow.
4. Create a Dedicated Work Area
Having a designated workspace can significantly enhance your efficiency. I built my workbench from scratch, and it’s been a game-changer for my projects. Here’s how to create your own:
- Tools Needed: Wood, screws, saw, drill.
- Steps:
- Choose a sturdy surface for your workbench, like plywood or MDF.
- Cut the wood to your desired size, usually around 4 feet long and 2 feet wide, depending on your available space.
- Assemble the bench with legs and supports for stability. Don’t skimp on the support; a wobbly workbench can lead to mishaps.
- Finish with a protective coat or sealant to help resist spills and stains.
5. Install a Garage Door Opener (if applicable)
If your garage door is manual and heavy, consider investing in an automatic garage door opener. It adds convenience and safety when you’re carrying heavy items.
- Tools Needed: Garage door opener kit, screwdriver, ladder.
- Steps:
- Follow the instructions in the opener kit carefully. This is where many people get confused and make mistakes.
- Securely mount the motor unit to the ceiling and attach the rail to the door.
- Test the opener several times to ensure it works smoothly and safely.
Troubleshooting & Fix-ups
While upgrading your garage, you may run into a few hiccups. Here are some common problems and how to handle them:
- Electrical Issues: If your lights flicker or don’t turn on, double-check your connections. Loose wires can cause all sorts of headaches. Make sure everything is securely connected and the circuit breaker is functioning properly.
- Heating Problems: If your heater doesn’t warm up the space, check for drafts. Even small gaps can let in cold air, negating your efforts. Use insulation or weather stripping to seal those gaps.
- Tool Storage Overload: If your tool storage gets cluttered quickly, consider reevaluating your organization system. Sometimes, less is more. Donate or discard tools you no longer use to free up space.
Common Mistakes & How to Avoid Them
As a DIYer, I’ve made my fair share of mistakes. Here are some common blunders I’ve seen and how you can avoid them:
- Not Reading Instructions: Many DIYers skip the manual, thinking they can figure it out. This often leads to mistakes that cost time and money. Take the time to read through the instructions, especially for electrical or complex installations.
- Ignoring Safety Gear: I’ve seen people forget gloves or safety glasses. Protecting yourself should always come first. Invest in a good pair of gloves and safety goggles to avoid injuries.
- Rushing the Process: It’s easy to get excited and rush through upgrades. Take your time to ensure everything is done correctly. A rushed job could lead to accidents or improper installations.
Pro Tips & Lessons Learned
Here are some smaller tricks I’ve picked up along the way that can save you time and frustration:
- Label Everything: If you’re like me and tend to forget where things go, labeling containers and drawers can save you a ton of time searching for tools.
- Use a Magnetic Strip: Attach a magnetic strip to your wall for small metal tools and fasteners. This keeps them organized and easy to grab.
- Plan for Future Upgrades: When organizing, think about future projects you want to tackle. This will help you set up your space for long-term functionality.
Budget & Time Signals
When planning your upgrades, consider the following:
- Budget: Depending on what you choose to upgrade, costs can vary widely. Basic lighting upgrades might be as low as $50, while a complete tool organization system could run you a few hundred dollars.
- Time: Each project can take anywhere from a few hours to a couple of days, depending on complexity. Plan accordingly and don’t rush.
When to Call a Pro
Sometimes, despite our best efforts, certain tasks are better left to the professionals. Here are some signs that it’s time to call in an expert:
- Electrical Work Beyond Your Skill Level: If you’re uncomfortable with wiring or electrical installations, it’s best to hire a licensed electrician. Safety comes first.
- Structural Changes: If your upgrades involve significant changes to the structure of your garage, such as removing walls or adding insulation, consult a contractor.
Conclusion
Upgrading your garage can be a rewarding experience that transforms your DIY projects. By taking it step by step, ensuring safety, and learning from common mistakes, you can create a workspace that is both functional and enjoyable. Remember to take your time, invest in quality tools, and don’t hesitate to reach out for help when needed.
As a simple next step, why not start by upgrading your lights? It’s a task that can be completed in just a few hours and will make a huge difference in your workspace. Happy DIYing!
Recommended Gear
Disclosure: As an Amazon Associate, we may earn from qualifying purchases at no extra cost to you.
Common Mistakes
- Skipping reading instructions leading to installation errors.
- Ignoring safety gear such as gloves and goggles.
- Rushing upgrades causing accidents or faulty setups.
- Overloading tool storage without proper organization.
- Neglecting to check for drafts which reduce heating effectiveness.
More in Automotive