Expert Tips for Eco-Friendly Products for Automotive DIY Your Wallet Will Thank You For (Fall, August)
)
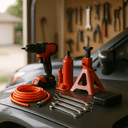
Tools Needed
- wrenches
- screwdrivers
- pliers
- torque wrench
- cleaning rags
- funnel
- containers for recycling
- safety goggles
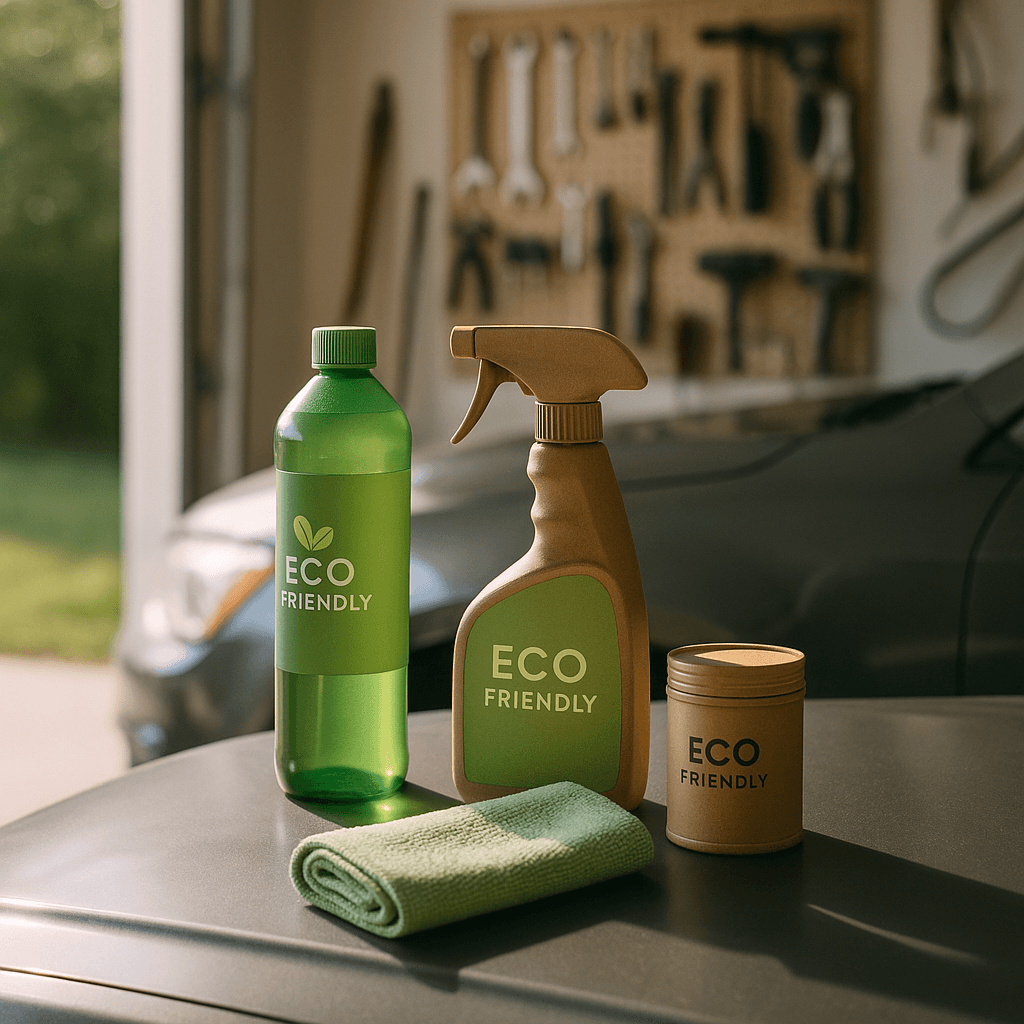
Materials Needed
- biodegradable engine cleaner
- low-VOC paints and coatings
- organic waxes and polishes
- recycled oil and fluids
- natural ingredient grease
Safety Tips
- Wear safety goggles and gloves to protect against harmful substances and sharp edges.
- Ensure your vehicle is properly supported on jack stands; never rely solely on a jack.
- Work in a well-lit, clean, and organized workspace to avoid accidents.
- Use a funnel to prevent spills when adding fluids.
Before You Start / Overview of Prerequisites
Before diving into any automotive DIY project, especially when using eco-friendly products, it’s essential to prepare adequately. Start by gathering the right tools and materials. For your eco-friendly projects, you might need basic automotive tools like wrenches, screwdrivers, pliers, and a torque wrench. Additionally, consider having cleaning rags, a funnel, and containers for recycling used materials. Safety goggles and gloves are also crucial to protect yourself from harmful substances and sharp edges.
Ensure you have a clean workspace and good lighting. Having a well-organized area helps you work efficiently and avoids accidents. Make sure your vehicle is supported properly on jack stands; never rely solely on a jack. This is non-negotiable for your safety. Check the service manual of your vehicle for specific torque specifications for fasteners. Lastly, take a moment to familiarize yourself with eco-friendly products you plan to use, as some may have unique application methods or drying times.
Method Overview
The approach we take in using eco-friendly products for automotive DIY involves a step-by-step method that combines understanding the materials, ensuring safety, and applying techniques that maximize effectiveness. Eco-friendly automotive products can range from biodegradable engine cleaners to organic waxes and low-VOC paints. We focus on products that maintain the mechanical functions of your vehicle while minimizing environmental impact.
This method works because it leverages modern advancements in eco-chemistry, which have produced effective alternatives to traditional automotive fluids and cleaners. Many of these products perform just as well, if not better, than their conventional counterparts. Additionally, using these products can save money in the long run, as they often lead to less wear and tear on your vehicle and lower disposal costs for harmful chemicals.
By following our detailed steps, you can ensure that you not only protect the environment but also your wallet.
Deep Step Detail
Step 1: Choosing the Right Eco-Friendly Products
The first step is to select eco-friendly products that suit your automotive needs. Here are some common types:
- Biodegradable engine cleaners
- Low-VOC paints and coatings
- Organic waxes and polishes
- Recycled oil and fluids
- Grease made from natural ingredients
Each product comes with its own set of instructions and applications. Always read the labels carefully to ensure you understand how to use them appropriately. Look for certifications or marks indicating that the product is truly eco-friendly.
Step 2: Cleaning and Preparing the Vehicle
Once you've chosen your products, it's time to clean and prepare your vehicle. Start by removing any dirt or grime using a biodegradable engine cleaner. Apply the cleaner according to the manufacturer’s instructions, ensuring it’s safe for the surfaces you’re treating. Use a soft brush or rag to scrub away any stubborn stains. After cleaning, rinse thoroughly with water to avoid any residue that could interfere with future applications.
Step 3: Applying Eco-Friendly Products
Depending on the project, the application will vary. If you are painting or waxing, ensure the surface is completely dry before proceeding. For painting, use low-VOC paint in a well-ventilated area and apply thin layers to avoid drips. If you’re applying an organic wax, use a soft cloth and work it into the surface in small sections. Allow it to dry slightly before buffing it off to achieve a shine.
For engine fluids, make sure to recycle old oil and fluids responsibly. Many auto parts stores accept used fluids, which is both eco-friendly and often required by law. Always use a funnel to prevent spills when adding new fluids.
Step 4: Maintaining Your Vehicle
After completing your project, maintain your vehicle properly using eco-friendly products. Regularly check fluid levels and clean any spills immediately with biodegradable cleaners. Keep your car waxed to protect the paint and improve longevity. Proper maintenance not only enhances the performance of your vehicle but also reduces the frequency of repairs, saving you money over time.
Troubleshooting & Fix-Ups
Even with the best planning, challenges can arise during automotive DIY projects. Here are common issues and how to fix them:
Problem 1: Streaks or Uneven Finish When Painting
If you notice streaks or an uneven finish after painting, it could be due to applying too thick a coat or not allowing adequate drying time. To fix this, lightly sand the area with fine-grit sandpaper and apply another thin coat of paint, allowing each layer to dry completely before applying the next one.
Problem 2: Oil Leaks
If you notice oil leaking after changing fluids, ensure that you’ve tightened the drain plug or oil filter according to the torque specifications from your service manual. If the leak persists, double-check that the old gasket was removed and that you used a new one during installation.
Problem 3: Wax Doesn’t Shine
If your eco-friendly wax isn’t providing the shine you expected, it may be due to inadequate buffing. Make sure to use a clean, dry microfiber cloth and buff the surface evenly to enhance the shine. If the product has dried too long before buffing, you may need to apply another layer and buff immediately.
Pro Tips
Here are some expert tips that can help improve your automotive DIY projects:
- Plan Your Time: Always allocate more time than you think you’ll need. Rushing can lead to mistakes.
- Read Instructions Thoroughly: Don’t skip this step. Each product may have specific requirements that make all the difference.
- Test Small Areas First: Before applying a new product extensively, test it on a small, inconspicuous area to ensure compatibility.
- Stay Organized: Keep all your tools and products within arm’s reach to save time and prevent accidents.
- Ask for Help: If you’re unsure about a step, don’t hesitate to ask a knowledgeable friend or professional.
When to Call a Pro
While many automotive tasks can be performed successfully by enthusiasts, there are certain situations where it’s best to call a professional:
- If you encounter a significant oil leak that you can’t diagnose.
- When you need to replace critical engine components that require expert calibration.
- If you’re unsure about handling electrical systems or complex wiring.
- If you’re uncomfortable with a task or feel you lack the experience required.
- When any part of the job exceeds your budget or timeframe significantly.
Being aware of these thresholds can save you time, money, and frustration.
Budget & Time Signals
Realistic budgeting and time estimates are essential for a successful DIY project. Here's a breakdown of what to expect:
- Time: Depending on the complexity, a simple oil change can take about 30 minutes, while a full paint job might take several hours or even days for proper drying.
- Budget: Basic eco-friendly products may cost slightly more than their conventional counterparts, but they often yield long-term savings. Expect to spend around $50-$150 for a simple maintenance project with eco-friendly products.
Make sure to account for unexpected costs, such as tools or additional materials that may be needed. Always have a little extra budgeted for emergencies.
Conclusion
By following these expert tips for eco-friendly products in your automotive DIY projects, you not only enhance the performance and appearance of your vehicle but also contribute positively to the environment. This dual benefit can lead to significant savings over time, making it a win-win situation for both your wallet and the planet. Remember to prioritize safety and preparation, and don't hesitate to call a professional when needed. Stay informed about the products you use and the techniques you apply. With confidence and practice, you can tackle any project that comes your way. Now, gather your tools, choose your eco-friendly products, and get started on your next automotive DIY adventure!
Recommended Gear
Disclosure: As an Amazon Associate, we may earn from qualifying purchases at no extra cost to you.
Common Mistakes
- Applying paint too thickly or not allowing adequate drying time causing streaks or uneven finish.
- Not tightening drain plugs or oil filters properly leading to oil leaks.
- Inadequate buffing of wax resulting in poor shine.
- Skipping product instructions or not testing on small areas first.
More in Automotive