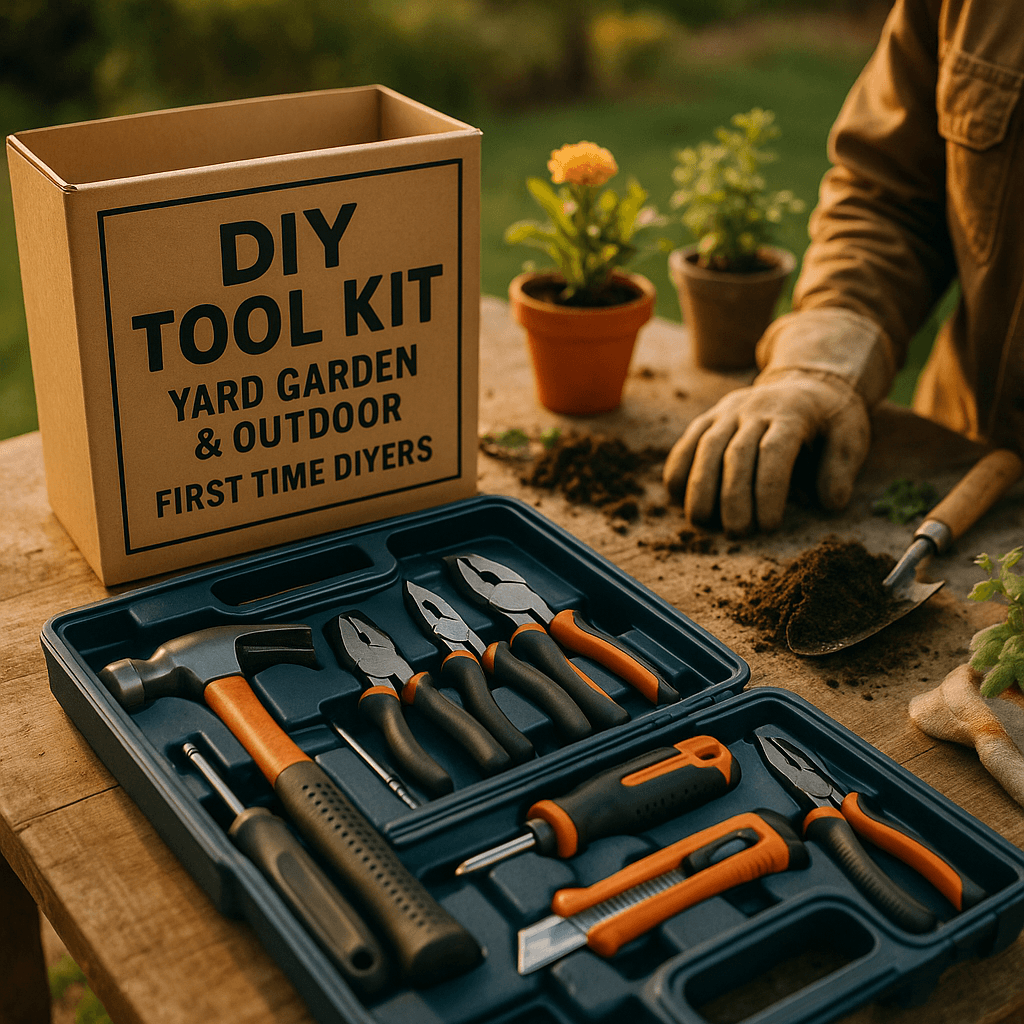
Easy DIY Tool Kits for Yard, Garden, & Outdoor DIY for First-Time DIYers (Winter, December, Year-End)
Tools Needed
Materials Needed
Safety Tips
- Use personal protective equipment (PPE) like gloves, goggles, and sturdy footwear when working.
- Follow outdoor chemical labels carefully when using fertilizers or pesticides.
- Be cautious on slopes and uneven ground to prevent slips and falls.
- Avoid working in severe weather conditions to reduce accident risks.
Easy DIY Tool Kits for Yard, Garden, & Outdoor DIY for First-Time DIYers
Winter is here, but don’t hang up your tools just yet! This season is the perfect time to prep your yard and garden for spring. Whether you're crafting a cozy outdoor space for winter gatherings or readying your garden for the next growing season, having the right tools can make all the difference.
Quick Answer
Start your DIY outdoor projects with a basic tool kit: shovel, rake, pruning shears, garden gloves, and a sturdy wheelbarrow. This combo handles most small to medium tasks effectively without straining your budget.
Before You Start
Jumping into DIY can be thrilling but also intimidating. I once thought I could just borrow tools as needed, but I quickly learned that having my own gear made a world of difference. Imagine getting ready to dig and realizing you’re waiting on a neighbor! Planning ahead is key. Think about the tasks you want to tackle and how your tools will fit into your plans.
Method Overview
I’ll guide you through assembling a DIY tool kit that’s versatile enough for various outdoor projects. If you’re considering larger landscaping jobs, you might want to hire a pro or rent specialized equipment.
Experience Context
A few winters ago, I decided to tackle my garden on a whim. I figured I could wing it with whatever tools I had, which turned out to be a big mistake. My rusty shovel broke mid-digging, costing me time and effort. That experience taught me that sometimes, spending a little more on quality tools saves a lot of headaches down the road. I opted for a proper tool kit afterward, and I’ve never looked back.
Deep Steps
Here’s how to assemble your DIY tool kit step by step:
- Choose Your Tools: Start with the essentials:
- Shovel: A round-point shovel is your best bet for digging and moving soil.
- Rake: A bow rake is ideal for leveling soil and collecting debris.
- Pruning Shears: Look for quality shears that can handle branches up to ¾ inch thick.
- Garden Gloves: Invest in a sturdy pair to protect your hands.
- Wheelbarrow: A durable wheelbarrow helps you transport materials efficiently.
- Find a Storage Solution: Organize your tools in a shed or garage.
- Pegboard: Hanging tools on a pegboard keeps them visible and accessible.
- Toolbox: A toolbox can help keep smaller items like gloves and shears organized.
- Consider Additional Accessories: Depending on your projects, you might need:
- Garden Hose: Essential for watering plants.
- Fertilizers: A good fertilizer can make your plants thrive.
- Mulch: Helps retain moisture and suppress weeds.
- Maintain Your Tools: Regular maintenance extends your tools’ lifespan. Clean them after each use and sharpen blades when necessary.
Decision Points
As you put together your tool kit, you’ll face some choices:
- Quality vs. Cost: I opted for durable tools rather than cheap ones that might break. The tradeoff was a higher upfront cost, but it paid off with fewer repairs and replacements.
- Storage Options: I initially thought about a simple shelf but switched to a pegboard for better organization. This decision made my workflow smoother.
- Tool Brand: I debated between well-known brands and lesser-known ones. I chose trusted brands for reliability, even if it meant spending a bit more.
Troubleshooting & Fix-ups
Even with planning, things can go wrong. Here are some issues you might face and how to fix them:
- Rusty Tools: If you spot rust, clean it with a vinegar and baking soda mix. Rinse and dry thoroughly to prevent further rust.
- Broken Wheelbarrow: If the tire goes flat, check for punctures. Use a tire repair kit to patch it or replace the tire if it’s too worn.
- Dull Pruning Shears: If your shears aren’t cutting well, sharpen them using a sharpening stone or file. Sharp tools make clean cuts.
- Misplaced Tools: If you often lose tools, consider color-coding your storage. Bright colors help you locate items quickly.
Common Mistakes & How to Avoid Them
From my experiences, here are some blunders to sidestep:
- Not Planning Ahead: Always have a clear plan. Know which tools you'll need for your tasks.
- Skipping Safety Gear: Don’t overlook PPE (personal protective equipment) like gloves and goggles. Always wear them when working.
- Neglecting Maintenance: Failing to clean and maintain tools can lead to bigger issues down the line. Develop a habit of regular checks.
- Buying Cheap Tools: Investing in quality tools is worth it in the long run. Don’t skimp on essentials you’ll use frequently.
Safety Tips
Stay safe while working on outdoor projects:
- Use PPE with Power Equipment: Always wear gloves, goggles, and sturdy footwear when using power tools.
- Follow Outdoor Chemical Labels: If you use fertilizers or pesticides, read the labels to avoid harmful reactions.
- Be Cautious on Slopes: When working on uneven ground, be mindful of your footing to prevent slips and falls.
- Check Weather Conditions: Avoid working in severe weather, as it increases the risk of accidents.
Budget & Time Ranges
Expect to spend between $100 to $300 on your DIY tool kit, depending on the quality and brands you choose. Setting up your workspace can take a few hours to a full day, especially if you're organizing your garage or shed.
Stop & Call a Pro
If you encounter these issues, it’s time to consider bringing in a professional:
- Structural Damage: Significant damage like uprooted trees or severe erosion may require expert help.
- Complex Landscaping: Projects needing heavy machinery or intricate designs are best left to pros.
- Health Risks: If dealing with hazardous materials or unsure about regulations, it’s safer to consult an expert.
- Time Constraints: If your schedule is too tight to manage the project, don’t hesitate to reach out for help.
What I’d Do Differently If I Did This Again
Reflecting on my journey, here’s what I’d change:
- Skip the Unnecessary Step: I wouldn’t waste time on temporary storage; I’d invest in a pegboard right away.
- Do an Earlier Step: I’d create a detailed list of tools needed before heading to the store to avoid impulse buys.
- Upgrade My Tools: I’d choose a more durable wheelbarrow that can handle heavier loads better.
- Prepare for Surprises: I’d set aside a budget cushion for unexpected costs like additional tools or materials.
By following this guide, you’ll be well-equipped to tackle your outdoor projects with confidence. The right tools can truly transform your DIY experience!
Recommended Gear
Disclosure: As an Amazon Associate, we may earn from qualifying purchases at no extra cost to you.
Common Mistakes
- Not planning ahead and lacking a clear tool list.
- Skipping safety gear such as gloves and goggles.
- Neglecting regular tool maintenance leading to damage.
- Buying cheap, low-quality tools that break easily.
)